On Saturday August 27th, 2011 I held a sold out workshop in Seattle. This article talks about what we did and shows off some of the photos that my students managed to get that day. If you would like to attend a workshop with me in the future, please send me an email and I’ll notify you the next time I offer a workshop. Please include the city where you’d like to have a workshop in your mail.
Location I – Great Photos Are Easier With Great Models
If you saw my Color Efex Pro 4 preview article, then you’ve already seen some of my shots from the workshop. We were very lucky to have one of my favorite models, Raia (above left), as well as a new model to the area – Brettlin (above right). Both models were excellent and really helped the students to get some great portrait shots that they had never got before.

The feedback from the workshop was nearly unanimous – I could do a whole workshop just using these two models and the students in attendance would have been very pleased. I’ll keep that feedback in mind and possibly do that at some point in the future.
Another popular part of this session was that I demonstrated the great shots you can get with the new 70-200mm lenses by Canon and Nikon. Those who didn’t have this lens already were pretty impressed to see what it could do (especially those who borrowed mine). I’ve since heard that there are some lighter wallets after the workshop for those who decided that they couldn’t live without these great lenses any longer.
What Went Well: Great models and lots of help from the assistants led to everyone getting one of their favorite shots of the day here.
How I’ll Improve Next Time: We shot for 2 hours, but given the number of students at least 4 was needed. Next time I may just do a whole day with the models or do 4 hours with a much smaller group.
Location II – Pike Place Market & The Gum Wall

Getting the Shot | 
Gum Wall Swirls |

Nasty, but Fun | 
Colors Galore |

Fun with Flowers & Signs (X100 Shot) | 
Flower Lady Models |
For this session we all met at the market and due to the crowds we decided to start at the Gum Wall. During this session I had fun teaching students how to do motion swirls and practice with depth of field using different objects on the wall. This also ended up being a fun impromptu place to get street walker shots (including some pretty girls – see below). After we had enough fun shooting gum, we made our way to the market to practice macro, shallow depth of field and environment shots.
What Went Well: Lots of interesting subjects to shoot and everybody came away with at least one great shot.
How I’ll Improve Next Time: We spent too much time at the gum wall and the massive crowd led to chaos at the market. Next time I will spend less time at the gum wall and create a more structured method for going through he market. I’ll also have a better cell phone list for everyone in case we get separated.
Location III – University of Washington Campus

Handheld Long Exposure Shot with a FujiFilm FinePix X100
The night before the workshop I got news from our café contact that the location we planned to visit near Pioneer Square was closed – WTF? So despite weeks of advanced planning, I found myself scrambling for a plan b. The result was a visit to their University District location, so this coupled with a sports game in the stadium near Pioneer Square meant I needed a new location. Not wanting to waste time driving, I decided to go for the scenic University of Washington Campus.
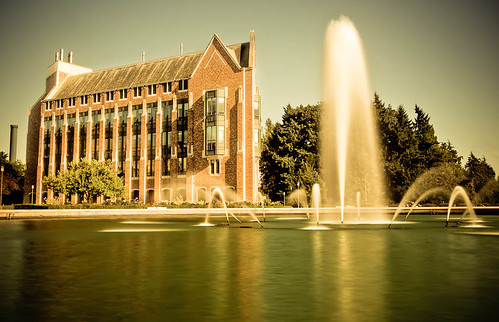
The weather was great so we set up our tripods for a great opportunities to get the fountain, but cranes in the background (erased above) made it tricky. In addition, there were no cherry blossoms in bloom, so the chance to get your typical great UW shots just weren’t there.
What Went Well: Postcard view of the fountain.
How I’ll Improve Next Time: I tried to do too much in one day – we didn’t need this location so I’d drop it from future workshops.
Location IV – Trabant Café

X-Rite i1Profiler
Thanks to X-Rite, I was able to let the students calibrate their displays with the all new i1Display Pro and the ColorMunki Display. This was great, but downloading images and calibration took a lot of time. As a result, I had very little time to do the photo editing portion of the workshop.
To compensate for the uncovered portion of the workshop, I made it up to everyone by doing a private one hour session with each student after the workshop. Everyone left my office with lots of smiles, so in the end I think this was a much better plan.
What Went Well: Everyone got a chance to see the new X-Rite calibration devices and get their displays showing accurate color. Everyone also got a chance to work with me 1:1 on the topic of their choice for an hour.
How I’ll Improve Next Time: This portion can be its own workshop on a separate day, so I won’t be including this portion during a full day photo workshop anymore.
Location V – Kerry Park at Sunset

Kerry Park Sunset
Click to View Processing Video
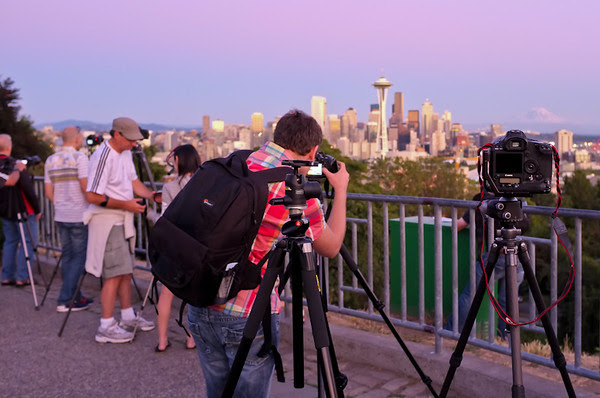
I’ve never been a fan of early sunset shots of Kerry Park, so I timed our arrival here at the start of sunset. Some students felt I cut it too close, so I’d probably allow for more time in the future. The good news is that my observations of everyone’s photos was that the early twilight shots they had were the best so I still agree with my timing decision.
During this session everyone got a chance to use their tripods and see what a difference a good tripod really makes (see my tripod recommendations). With exposures coming up on 30 seconds by the end of the evening, everyone learned what it takes to get a nice shot during and after the twilight hour.
What Went Well: I think everyone got a decent long-exposure shot of Seattle which was the goal of this session.
How I’ll Improve Next Time: This was a nice ending to the day. I needed to spend more time with some students than I was able to do, so next time I’ll work better with my assistants to make sure everyone gets the attention they deserve (i.e., no shooting for me and the assistants).
Students Photos & Comments
I really enjoy teaching and had a blast with my students and assistants on this workshop. However, the real proof of the success of a workshop are the photos the students share afterwards and what they have to say. What follows below is each student’s name, their photography skill level, a photo of them in action, their shots and optionally their thoughts about the workshop.
Christian – Just Started Beginner

Christian gets the shot
Copyright Luc Schoonjans - All Rights Reserved
Christian’s goal for the workshop was “I would like to be able to take photos that I or others look at and can't believe that I took them. Whether that's incredible candid moments of my family, staged shots, landscapes, architecture, whatever. I want someone to look at my photos and be blown away, and most importantly I want to be proud of what I was able to accomplish artistically & technically. To the point where eventually I would like to frame photos and hang in my house as art.”
Here’s a few cool photos he took during the workshop with his D7000:


Here’s what Christian had to say about the workshop:
... I learned a ton, made a number of great connections with other attendees and think I have a solid number of great (by my standards) images to work with and learn from. Unfortunately though, I’m now completely obsessed with the [Nikon] 70-200 f2.8 …
Colby – Intermediate

Colby Gets Low To Get The Shot
Copyright Luc Schoonjans - All Rights Reserved
Colby’s goal for the workshop was “To get a better grasp on composition … have more focus (within my mind) with photography, [and to] take away useful tips with post-processing “.
Here’s a few of his cool photos from the workshop:


Here’s what Colby had to say in his own words:
I had a great time
Dora – Newbie (Just Bought a DSLR)

Dora Discovers the Joy of the my Canon 70-200mm f/2.8L IS II USM
Copyright Luc Schoonjans
Dora was the least experienced shooter at the workshop. She came along with her 60D and kit lens, but I loaned her my EF 70-200mm f/2.8L IS II USM to get the shot below. She was the lucky winner of the free Think Tank Photo bag for owning the worst camera bag when she arrived to the workshop. This was a time where having the worst bag paid off!
Here’s one of her shots from the workshop (with a little skin soften, curves and sharpen post-processing help from me):

Brettlin by Dora Chan
Pete – Intermediate

Ron (left), Andrew (middle) and Pete (right)
Unprocessed Image Courtesy of Luc Schoonjans
Pete is a car enthusiast like me who loves photography. He joined this workshop for a “kick in the ass” to get his juices flowing again. He especially wanted to practice photographing people, so I was pleased to see the shots he came up with below:

Ron Teaching — Copyright Pete Harris

Raia — Copyright Pete Harris
Here’s what Pete had to say about the workshop:
Ron’s workshop was fun and informative. Getting experience shooting one of Ron’s incredible models was worth the workshop fee alone. It was also terrific experience to get his real-time guidance, and to network with the other folks that attend the day. His care and follow-up post-workshop has also been more than I expected. Looking forward to the next one.
Riki – Intermediate Point and Shoot Photographer

Riki has a little camera, but he can hang with the big boys
Riki took great pride in his Olympus E-PL1 as the only attendee who didn’t have a DSLR (although I shot with the X100 for part of the workshop). His goal for the workshop was to “…push myself forward both Composition wise, and editing wise. And hopefully shoot around some creative people.”
Here’s some amazing shots he got and processed very well:

Click this to see Riki’s entertaining photo comments

Largest Pano of the Workshop
Riki swore he wasn’t under the influence of anything when he shared his thoughts on the workshop:
"Ron organized a packed day covering lots of different shooting subjects. Personally I found his feedback on processing my photos, getting them to 'pop', to be huge for my day to day flows. When I had some 1:1 time I found him to be fire hose of helpful information covering so many processing topics, B&Ws, cropping & composition, future reading, computer hardware, Psychology of a photo viewing eye and how to process my photos to appeal to this. I went into the workshop happy with the level of photo I was taking but the shots didn't pop as much as others I'd seen, but came out with a clear path on how to really push my shots to the next level”
Tim – Beginner
Here’s what Tim had to say about why he took this workshop and what he hoped to get out of it:
“There are two main reasons I'm taking this class. The first, is to reduce the number of occurrences of "Wow! That would make a great shot... if I just knew the right technique to capture it." Sometimes, it's because I just don't know how to set up the camera to best capture the scene (Do I use evaluative or spot metering? Is it better as monochrome, or color?) Other times, it's because I can't visualize how to best compose the scene. Second, is to better understand the fineries of post processing.”
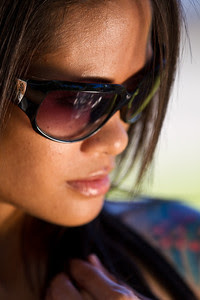
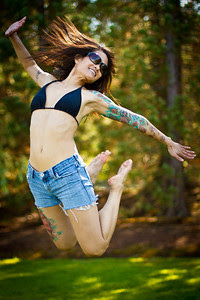
While everyone who participated in the workshop came away with a healthy selection of great shots, I think Tim ended up with the largest number of shots that made me say “that rocks”. In fact, I was jealous of a few of Tim’s shots because I was too busy teaching and didn’t have much time to shoot. Here’s a sample of some of his best shots of the day:

Here’s some of what Tim had to say about the workshop:
"Ron's workshop made me aware of the most consistent weaknesses in my photography, and gave me direction in overcoming them."
"If you've ever thought to teach yourself photography through guide books, do yourself a favor and sign up for this workshop. It's one thing to read about techniques, and another thing to have someone with years of experience walking you through them, and helping you adapt them to your vision."
"The best thing about this workshop is that it got me outside of my comfort zone; it changed the way I think about the photos I take and what's possible. Oh, and it was fun, too."
That’s what I like to hear!
Thanks to Assistants Luc & Andrew
Here’s a couple photos taken by my busy assistants when they had a short break for themselves:
I was blessed to have two great assistants on this workshop. This meant that the six students always had three possible people to talk to about any given issue. I thank Luc and Andrew for donating their time to help me out because I couldn’t have done it without them.
Check Out The Erly.Com Collection
I’m trying to experiment with a cool new image collection service by Erly.com to hold photos and links. Hopefully the students featured in this article will add more content when they get a chance.
Conclusion

Woohoo by Ron
Five of the six students for this workshop replied to my survey and stated that they thought the workshop was useful and that they’d recommend it to others. To me that’s a successful workshop! When I compare some of the images above to those students pre-workshop photos I see a tremendous growth. This makes me even more happy as my true passion is sharing my love of all things photography with others.
I hope you will consider signing up for one of my future workshops after reading this article. Contact me if you are interested in a workshop, private lessons or for a seminar. You can also see my gear talk in New York at B&H on October 26th.
Disclaimer
I may get a commission if you make a purchase using links found in this article.
NOTE: This site requires cookies and uses affiliate linking to sites that use cookies.
. Either way, your support is greatly appreciated!
This blog is intended for freelance writing and sharing of opinions and is not a representative of any of the companies whose links are provided on this site.
The opinions provided are of Ron Martinsen alone and do not reflect the view of any other entity


