Wednesday, November 25, 2015

Cyber Monday Deals–Topaz, on1 and More

Here’s the latest deals – some of which expire in less than 24 hours or while supplies last so act fast.

The survival of my blog depends on donations  and sales from clicking links on the blog, so please be sure to use my links when ordering. If you have any questions please do not hesitate to contact me.

You can also find more deals up on the Hot Deals page, as well as from my discount coupon codes.


See my review for Texture Effects and more

Cyber Monday Deal

Black Friday

B&H Deals

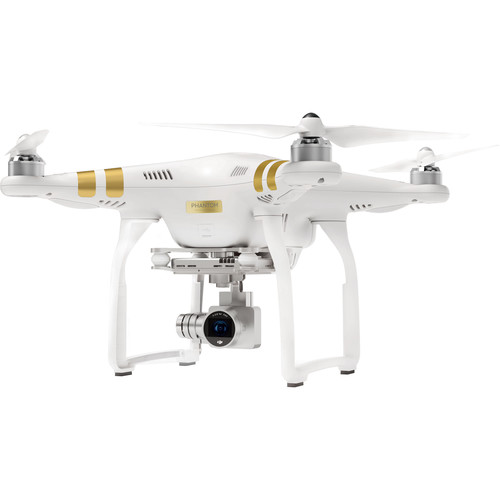
$100 OFF - DJI Phantom 3 Professional Quadcopter with 4K Camera and 3-Axis Gimbal

or $400 off version B

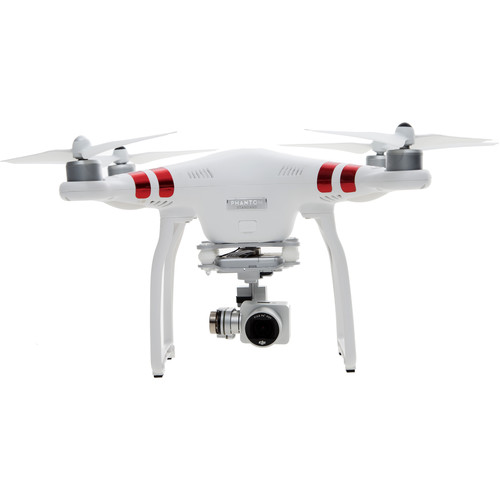
DJI Phantom 3 Standard with 2.7K Camera and 3-Axis Gimbal
Only $599!!! - DJI Phantom 3 Standard with 2.7K Camera and 3-Axis Gimbal

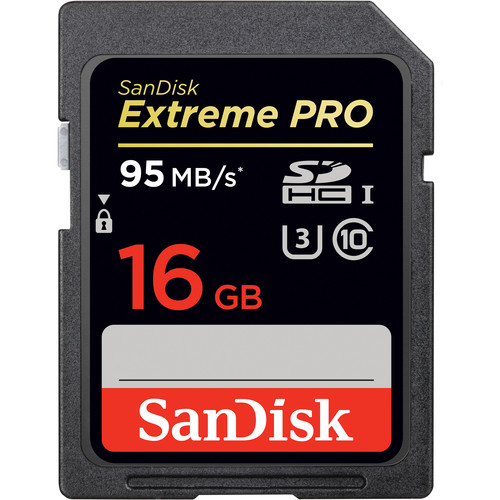
Memory Cards from Sandisk, Lexar & more for as little as $6.99

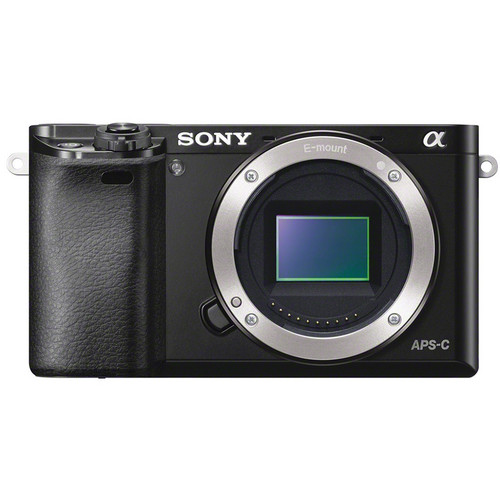
Sony Alpha a6000 Mirrorless Digital Camera w/ 55-210mm Lens & Accessories kit
$400 off - Sony Alpha a6000 Mirrorless Digital Camera w/ 55-210mm Lens & Accessories kit

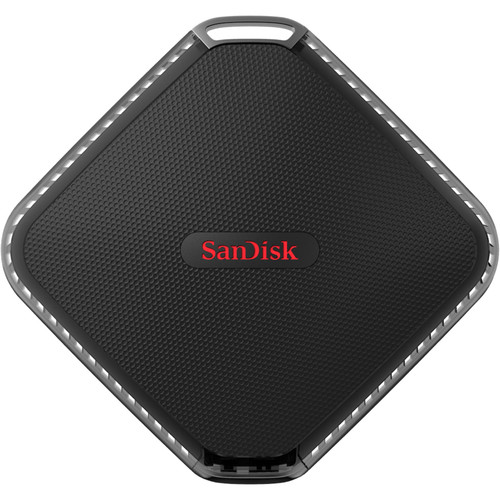
SanDisk 120GB Extreme 500 Portable SSD (Only $59.99 - 240GB & 480GB versions available)

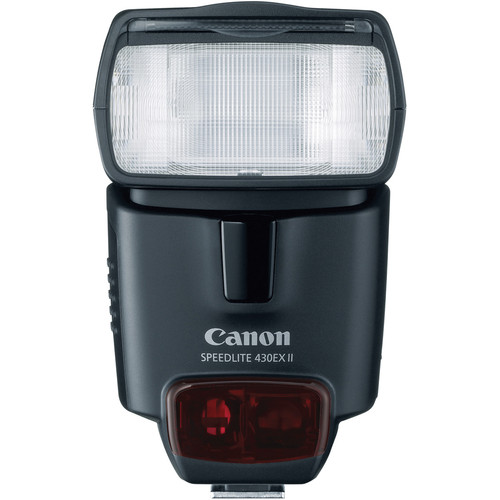
$100 OFF - Canon Speedlite 430EX II

Sony Cyber-shot DSC-WX350 (Was $298, now just $198)

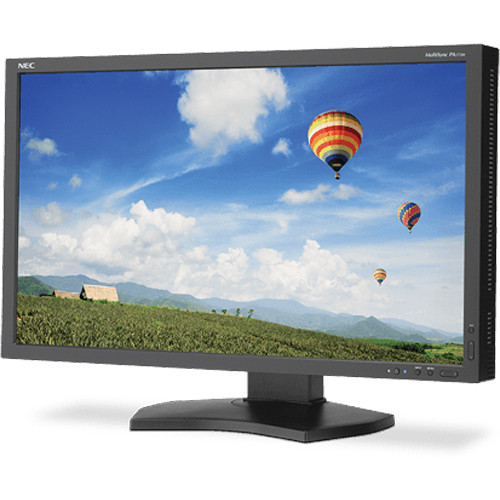
$350 OFF - NEC PA272W-BK 27" LED

See my review for the PA series

Camera Deals Pages

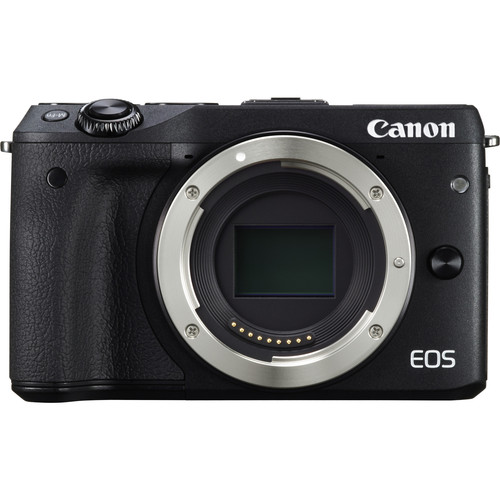
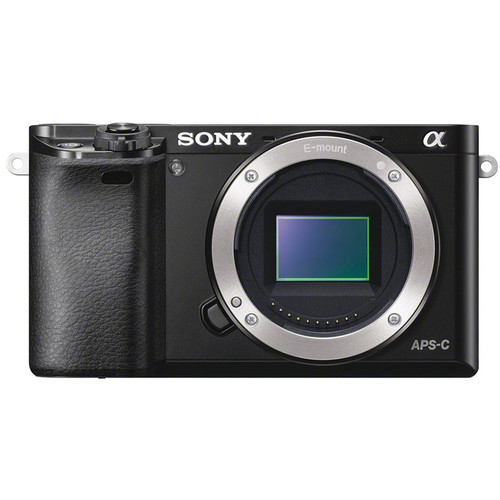
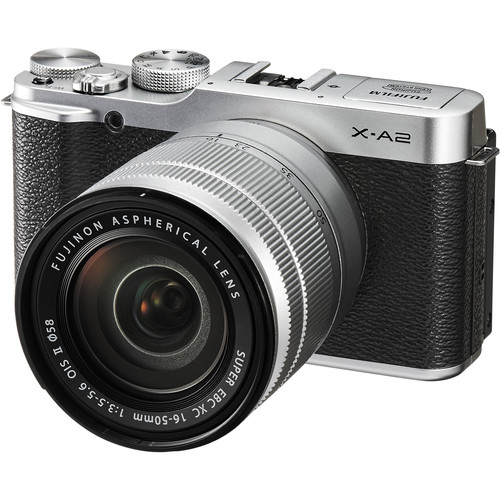
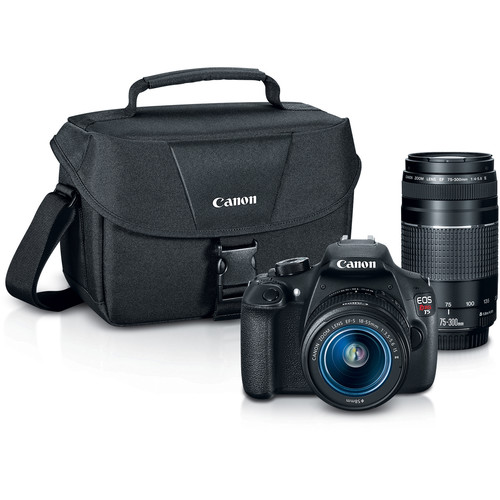
Click link or photo to see deals on many models / bundles – more than just what you see in the photo below:

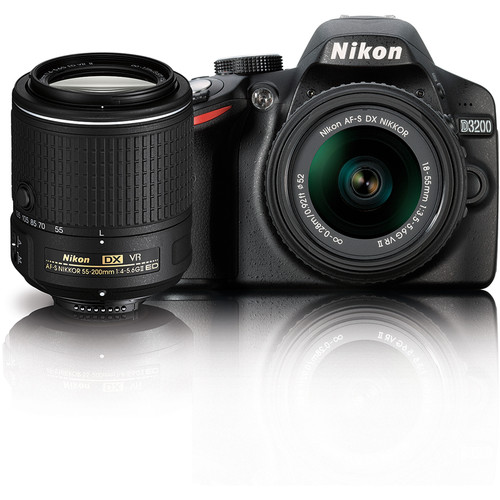
Nikon DSLR deals - as little as $396.95

Canon EOS M3 Mirrorless for as little as $429 ($250 off)0

Sony camera deals - for as little as $398

Fujifilm camera deals for as little as $499

Canon DSLR Deals for as little as $449

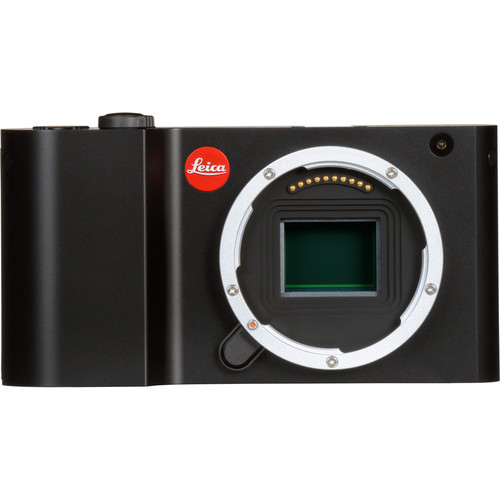
Leica at little as $1628

Adorama


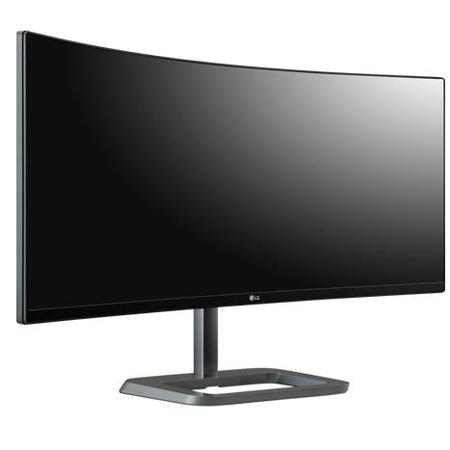
Only $635 after rebate - LG Electronics 34UC87C-B 34" Curved Ultra Wide Monitor, WQHD, 3440 x 1440

More Deals Coming

I’ve got a lot of deal info coming in so check back here often and sign up for my deals newsletter to stay up on the latest deals.

Other articles you may enjoy

If you enjoyed this article, you may also enjoy these:

Disclosure

If you make a purchase using links found in this article, I may make a commission. It doesn’t cost you a penny more, but it does help to support future articles like this.

NOTE: This site requires cookies and uses affiliate linking to sites that use cookies.

If you enjoyed this article, please support future articles like this by making a donation or saving money by using my discount coupon codes. Either way, your support is greatly appreciated!

This blog is intended for freelance writing and sharing of opinions and is not a representative of any of the companies whose links are provided on this site.

The opinions provided are of Ron Martinsen alone and do not reflect the view of any other entity

Tuesday, November 17, 2015

Nikon announces the D5, SB-5000 & WT-6

NIKON ANNOUNCES DEVELOPMENT OF THE NIKON D5 DSLR CAMERA

Development of Wireless Transmitter and Flagship Speedlight Also Announced

MELVILLE, NY (November 17, 2015) – Today, Nikon Corporation announced the development of the next generation of professional FX-format DSLRs, the Nikon D5. Nikon also announced the development of the SB-5000 Speedlight, which will be Nikon’s flagship Speedlight, as well as the development of the new WT-6 Wireless Transmitter.

The Nikon D5 will offer professional photographers an even higher level of performance and image quality. When combined with these advanced accessories and the vast lineup of existing NIKKOR lenses, Nikon is offering photographers new levels of imaging expression.

Details about these products, including release date and suggested retail price will be announced at a future date and time. For more information about Nikon and the latest Nikon cameras and products, please visit www.nikonusa.com.

About Nikon

Nikon, At the Heart of the Image™. Nikon Inc. is a world leader in digital imaging, precision optics and photo imaging technology; globally recognized for setting new standards in product design and performance for an award-winning array of equipment that enables users to tell their stories through amazing photos and videos. Nikon Inc. distributes consumer and professional digital SLR cameras, NIKKOR optics, Speedlights and system accessories; Nikon COOLPIX® compact digital cameras; 35mm film SLR cameras; Nikon software products and Nikon sports and recreational optics as well as the Nikon 1 compact interchangeable lens camera system. Nikon Corporation, the parent company of Nikon Inc., recently announced the production of 95 million NIKKOR lenses in 2015, creating a new milestone in Nikon’s heritage of superior optics. For more information, dial (800) NIKON-US or visit http://www.nikonusa.com, which links all levels of photographers to the Web's most comprehensive photo learning and sharing communities. Connect with Nikon and other photographers on Facebook, Google+, Twitter, YouTube, Instagram, Vimeo and Flickr.

NOTE: This site requires cookies and uses affiliate linking to sites that use cookies.

If you enjoyed this article, please support future articles like this by making a donation or saving money by using my discount coupon codes. Either way, your support is greatly appreciated!

This blog is intended for freelance writing and sharing of opinions and is not a representative of any of the companies whose links are provided on this site.

The opinions provided are of Ron Martinsen alone and do not reflect the view of any other entity

Monday, November 16, 2015

Ask Ron: How do I ship my prints?

While I mention this topic in my Printing 101 eBook, not everyone has my book so I thought I’d respond to a readers email today via a quick “Ask Ron” article.

Question

Here’s essentially what today’s reader was asking:

How do I ship my prints and are there any problems with rolling papers – especially thick media like Epson Hot & Cold Press Papers? Would there be any issues to be concerned about?

Answer

Shipping prints is tricky because a lot of things can go wrong in transit. To minimize risk you’ll want to pack the print carefully and use a little extra stuffing paper to make sure the print doesn’t slide and shift in transit. I’ll list the steps on how I ship a print, but I’m starting at the point where the print is done so if you are shipping a canvas or are printing on a paper that scratches easily then I’ll assume you’ve already protected the print prior to shipping.

Here’s what I do…

Step 1 – Cover the print in Acid-Free Tissue

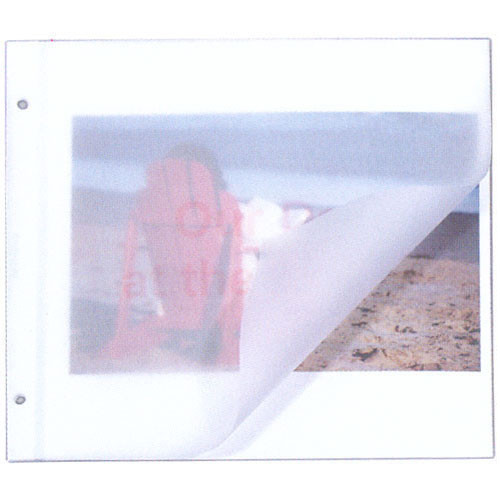
Lineco Buffered Acid-Free Tissue Paper

Lineco Buffered Acid-Free Tissue Paper comes in sheets (my preference) and rolls, and I use it all the time to protect prints even when I’m not shipping them. Once I take a print off the printer I put one of these sheets on top to protect the print from dust, scratches, etc… However, when rolling up your print for shipping then it really helps a lot to avoid damage from scratches which can occur during the rolling process.

Step 2 – Optionally place it in a photo bag

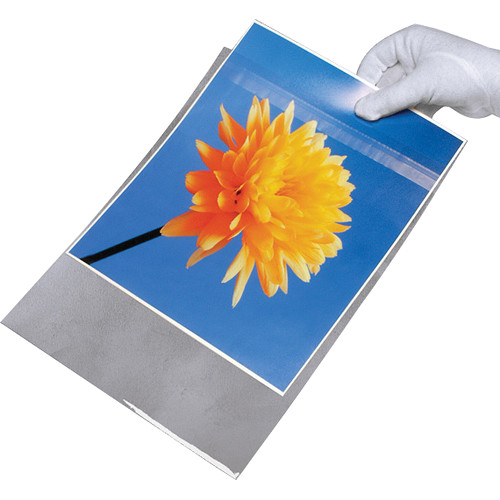
Lineco Archivalware Photo/Art Bags

After my print has degassed, I place it in a Lineco Archivalware Photo/Art Bags and leave the end open unless I have a special reason to close it. As a result, when shipping I use these bags for added protection. While it is somewhat redundant to do both, that’s what I do and it’s worked well for me. You can certainly skip one or the other, but I don’t.

Step 3 – Roll and Place in Mailing Tubes


Mailing tubes on Amazon

When it comes time to pack up the print, the most economical way to go is using a mailing tube. A general rule of thumb is to get the biggest diameter tube that you can practically use as the less tight you have to roll then the easier it will uncurl when it arrives at its destination.

It’s highly recommended that you cut the tube to the length you need to avoid the print shifting in transit. If that isn’t possible or practical then you’ll want to use some more Lineco Buffered Acid-Free Tissue Paper to avoid damaging the edges of your print. DO NOT use newspaper to stuff the tube as the nasty ink will transfer to your print and ruin it.

Be sure to tape or staple the plastic caps as they will come out in transit if you don’t.

Alternatives to tubes?

Lineco Museum Quality Storage Box

While it is much more expensive and challenging to pack, some people prefer to ship their prints flat. If it’s just one print you can put it between a couple shets of cardboard and be in good shape assuming that you’ve taken the aforementioned protection steps. If you’ll be shipping multiple prints, then you might want to consider an exact fit Lineco Museum Quality Storage Box. I use the larger capacity version of these to store my prints at home too, so these can be purchased in a size that meets your needs.

Again, you’ll want to avoid room for the prints to shuffle so inserting a piece of foam core board or cardboard to fill the gap and taping the edges is recommended.

Tip for Signing Your Prints

image
I use Number 02 PIGMA Micron Ink Pens

I always recommend signing your print using archival PIGMA ink before sending it to anyone, and I personally leave print master notes on the back of the print to remind me of what I did to make that print in case I need to do a reprint in the future. You can learn more about this process in more in my Printing 101 eBook.

Tip for the Print Recipient

Curling is inevitable when shipping in tubes

When your customer gets the print, you can advise them to remove it from the roll and unroll it right away. Initially they will look like the prints in the photo above, so you’ll want to advise them to roll them the opposite direction and use the shipping tissue paper (and bag if you used it) to protect the print. Here’s a video that shows how people do this counter curl:


Conclusion

While this article might come across as a Lineco advertisement, I assure you that I have no affiliation with them and have never communicated with them prior to this article. I just trust the Lineco brand after experimenting with cheaper alternatives. This isn’t to say there aren’t other good products at a cheaper price, but I haven’t found any that have met my needs yet.

An important thing to keep in mind that all of this preparation is expensive both in terms of time and materials, so be sure when you are giving your clients a quote that you don’t forget this expense and only think about shipping costs.

Other articles you may enjoy

If you enjoyed this article, you may also enjoy these:

Disclosure

If you make a purchase using links found in this article, I may make a commission. It doesn’t cost you a penny more, but it does help to support future articles like this.

NOTE: This site requires cookies and uses affiliate linking to sites that use cookies.

If you enjoyed this article, please support future articles like this by making a donation or saving money by using my discount coupon codes. Either way, your support is greatly appreciated!

This blog is intended for freelance writing and sharing of opinions and is not a representative of any of the companies whose links are provided on this site.

The opinions provided are of Ron Martinsen alone and do not reflect the view of any other entity

Thursday, November 12, 2015

REVIEW/Tutorial: Topaz Labs Texture Effects 1.0

Texture Effects User Interface

If you are familiar with Analog Efex (and if you aren’t don’t bother), then think of this as everything that products offer and much more. It begins with an extremely powerful user interface that allows for complex layering on par with Photoshop in an app that can run stand alone or integrated into Photoshop, Lightroom, etc… It goes far beyond by allowing nearly endless customizations that made me quickly realize that this is really the ultimate preset building tool that just happens to support your textures, borders, light leaks and more.

Take 15 minutes to at least watch the video tutorial, but read on to see why I really like this product!

Video Tutorial / Demo

A video is worth a thousand words, so here’s both a demo and a deep dive tutorial on how to use this powerful product:


Click here for the YouTube Page

Here’s the before and after of the image edited in the video:

Early Morning Preset [ronmartblog]

You can download this preset from within the Texture Effects Grid View Browser and searching the community presets for the word ronmartblog.

Product Tour

Main Interface
Main Interface (Click for a larger view)

When you start the product you are greeted with a user interface that will seem familiar to Impression and Glow users, but this is a significantly faster and more powerful variant. Whereas Impression was painful to use because it was so slow when it first came out, Ii never had any performance issues on my 5 year old system with Windows 10.

At its core the user-interface is designed for users to browse the massive library of over 130 customizable effects to create great images in a single click. However, the power of this product lies in its customization which starts with an extremely advanced layering system that is faster and nearly on par with Photoshop:

Example Adjustment Stack

With support for duplicate layers, show/hide, delete, reset and drag & drop reordering – this is the best layering system I’ve seen outside Photoshop itself.

In addition, some adjustment layers support custom masks and there’s global mask support (handy for Lightroom users). Here’s what the masking module looks like for both:

Masking Module
Masking Module

Within the adjustment layers are lots of options, but one of the more powerful ones is the namesake Textures adjustment shown here:

Texture Adjustment Module

Textures can be used with support for modifying the look and feel as well as blending mode and opacity of the texture. To help manage your textures, an extremely handy Texture Manager is available as shown here:

SNAGHTMLaec9616
Texture Manager shown with
Trey Ratcliff's Textures (sold separately – discount available)

If you are like me and many other photographers you probably take photos for use as textures and have them scattered all over the place. This is FINALLY the product that allows you to collect them in logical order and actual use them in a powerful way!

In addition to textures there’s support for keeping track of your borders and more. Like Analog Efex Pro and others, there’s also Light Leak support but again with support for the texture manager to keep track of any you have made or collected over time…

Light Leak Adjustment Module

Viewing all of the presets can be a challenge, but the effect grid view browser shown here makes it much easier:

Effect Grid View Browser

With support for filtering as well as viewing online community contributions, it is a great way to see how YOUR image will look with the countless number of effects available. Thankfully there’s also options to sort by newest and most downloaded as well as searching by name.

This is a well thought out UI that just works great right off the bat. I love it and now want to see these features in Impression and Glow!

Conclusion

Initially I didn’t think too much of this product, but when I jumped in and user the interface realized it was a lot more than I expected. While it is sold as a texture product, it’s really a powerful multi-layer preset tool that offers community integration as well. In fact, I wish they would have taken the best of Restyle, Impression and Glow and merged them all into this one product with this fast and powerful user interface.

By the time I was done, I started to think that this is much of what onOne Software has been trying to do for years with its products like PhotoFrame, Perfect Layers,  and more  (now part of Photo 10) – but this one does it without crashing and is fast and easy to use.  

Don’t let the simpleton name fool you – this is a powerful product that is worth a look. It’s also an amazing bargain, so at least check out the free trial! I highly recommend this product even if textures aren’t your thing as it makes for a great preset builder!

Stand alone or integrated it works the same – and it’s very fast! Lightroom users are going to love this!

Where to order

CLICK HERE to learn more and order!

From now until November 20th you can use the coupon code TEXTUREFX to get this amazing product for under $50! Afterwards you can use my discount coupon code to get the best price on the web on any (or all) Topaz Labs products. Here’s a screen shot to show you how to use coupon codes:

Enter the coupon code and click Apply Coupon

You may also be interested in this:

Trey Ratcliff's Textures Tutorial
Textures also available separately here
See my discount coupon code page for discounts on this!

Other articles you may enjoy

Here’s some of my Topaz Labs software reviews:

If you enjoyed this article, you may also enjoy these articles:

Disclosure

If you make a purchase using links found in this article, I may make a commission. It doesn’t cost you a penny more, but it does help to support future articles like this.

NOTE: This site requires cookies and uses affiliate linking to sites that use cookies.

If you enjoyed this article, please support future articles like this by making a donation or saving money by using my discount coupon codes. Either way, your support is greatly appreciated!

This blog is intended for freelance writing and sharing of opinions and is not a representative of any of the companies whose links are provided on this site.

The opinions provided are of Ron Martinsen alone and do not reflect the view of any other entity

Monday, November 9, 2015

B&H Deal Zone Anniversary Deals

B&H’s best deals are always their DealZone deals. These are short term deals at low prices that can almost never be beat elsewhere. To celebrate the anniversary of DealZone, B&H is offering EVERY deal zone deal from the past year available for 48 hours (while supplies last). If you were bummed that you missed a deal, now is your chance to get it again, but act fast!

BHDealZoneAnniversary
*** CLICK HERE to see the deals ***

This offer expires on November 10th at 11:59 PM Eastern Time.

Other articles you may enjoy

If you enjoyed this article, you may also enjoy these:

Disclosure

If you make a purchase using links found in this article, I may make a commission. It doesn’t cost you a penny more, but it does help to support future articles like this.

NOTE: This site requires cookies and uses affiliate linking to sites that use cookies.

If you enjoyed this article, please support future articles like this by making a donation or saving money by using my discount coupon codes. Either way, your support is greatly appreciated!

This blog is intended for freelance writing and sharing of opinions and is not a representative of any of the companies whose links are provided on this site.

The opinions provided are of Ron Martinsen alone and do not reflect the view of any other entity

Epson SureColor P800 Unboxing & Review

Epson SureColor P800 Tape Removal GIF
Epson SureColor P800
Lot’s of tape to remove, but it helps keep it safe in its travels to your home

Ever since I did my P600 review, I’ve been eager to test the Epson SureColor P800.  As the replacement for the legendary StylusPro 3880, it’s got big shoes to fill. However, this printer comes with everything I loved about the P600 and more, so it’s a long overdue upgrade.

In addition to things like wireless printing (with excellent iOS AirPrint support), one of the biggest improvements is the support for roll paper (sold separately) – and not using the basic adapters found on the P600. The P800 optional roll media adapter gets a heavy duty metal housing that bolts to the printer in seconds (without tools) and a proper print spindle similar to the one found on the 4900. This gives you first class roll support like you’d enjoy on the 4900 without the bulk of that printer. Here’s a picture that shows the different adapters:

P600 Roll Adapters (top) vs P800 Roll Media Adapter (bottom) P600 Roll Adapter (top) vs
Epson Roll Media Adapter for SureColor P800 (bottom)

I was so excited about this that I cleared out my 4900 to make room for this printer as my new primary printer for doing 17” roll print jobs (especially handy for things like Epson Exhibition Canvas).

While some will balk at having to pay an extra $200 (at the time this was written) for the roll adapter, I like the strategy of bundling it separately for those who don’t need this feature and who would rather save the money off the P800 base price.

Be careful when ordering

Epson SureColor P8000 vs P800 Box
P800 (top) vs P8000 (bottom) – Big Difference!

A funny thing happened when ordering – somewhere behind the scenes someone added an extra zero so instead of a P800 a P8000 arrived. While this was corrected without any troubles in this case, it’s something to keep in mind as the numbers are so close it’s easy for this mistake to happen again.

Conclusion

While I admit that I had my fair share of print head clogs with the 4900, I’ve never had the 3880 clog up so bad that one power cleaning couldn’t get it back in order. In fact, even after leaving it off for months at a time I’ve been able to turn it on and get a print right away. As a result, when I found out that the P800 would use the same print head as the 3880 and add roll support, I was happy to bid my 4900 farewell. I suspect I’m not alone in this frustration, so I was very eager to put this printer through its paces – as well as see how it does sitting idle during long-term testing. Click here to see my review to see how it did.

This is the hottest printer on the market this year, and the adapter is one of the “most wishable” items in B&H’s wish list database.

Where to order

Click here to learn more or order the P800 at B&H. My friends at Amazon have it available here.

Other articles you may enjoy

If you enjoyed this article, you may also enjoy these:

Disclosure

If you make a purchase using links found in this article, I may make a commission. It doesn’t cost you a penny more, but it does help to support future articles like this.

NOTE: This site requires cookies and uses affiliate linking to sites that use cookies.

If you enjoyed this article, please support future articles like this by making a donation or saving money by using my discount coupon codes. Either way, your support is greatly appreciated!

This blog is intended for freelance writing and sharing of opinions and is not a representative of any of the companies whose links are provided on this site.

The opinions provided are of Ron Martinsen alone and do not reflect the view of any other entity

Wednesday, November 4, 2015

Canon RAW Conversion Test–Nov 3, 2015

A reader was recently asking me about RAW vs JPEG for a Canon workflow and in the process of replying to those series of emails, I had an ADD moment.

For fun I started comparing the RAW conversion of a Canon CR2 raw file using the latest RAW conversion software from Adobe and Canon as of November 3, 2015. To make things more interesting, Canon actually has two versions of its Digital Photo Professional (DPP) software floating around for legacy reasons, so I was curious as to the result I’d get using what amounts various different conversion techniques.

This is actually an exercise I do time to time anyway because as software and firmware gets updated, the processing changes often yield different results (not always for the better). While this article is Canon specific the same concepts apply to any camera that creates a RAW image that is supported by computer based software and/or Adobe products. If you haven’t done this exercise on your own already, I’d encourage you to do so!

Default in-camera JPEG


In-Camera JPEG (downsized in Photoshop,watermarked by Zenfolio)

This is when the raw data is converted in-camera and applies all of the editing settings like color space, picture style, white balance, etc… to give you the image you see on the rear LCD panel of your camera. Even if you “only shoot raw” you see this image as the thumbnail to your RAW file and it’s the data that the camera’s histogram that you see is based on.

This raw processing is burned into the firmware of your camera and it will only get updated if something significant warrants a change. As a result, you’ll often fine that the in-camera RAW processing is very different from software processing – especially if the software is getting updated regularly.

Lightroom CC 2015.2.1 (ACR 9.2.486)

SNAGHTML16597e64
Lightroom CC 2015.2.1 / ACR 9.2.486

Lightroom uses Adobe Camera RAW (ACR) to convert your raw data in a CR2 file into something you can see and use. The develop tab allows you to tweak those settings, but Adobe also reverse engineers these files to try to create something you’d like as a starting point for your editing process (in the Camera Calibration section – see the “Process” option). The default is Adobe Standard which simulates Adobe’s ideal, but “camera” processing styles are designed to loosely mimic how your camera process images. In the case of Canon, they are trying to map to your Picture Styles.

Digital Photo Professional  (DPP)

DPP comes in the legacy version, DPP 3.x and under, which supports nearly every CR2 file Canon has made. Recent updates have added support for easily updating lenses without having to get a whole new version of DPP. Here’s what 3.x looks like:

DPP 3.15
DPP 3.15

It’s a crude and nasty UI that you’ll be tempted to dismiss. In fact, most people never bother to even install DPP off the disc so many don’t even know it exists. While the user interface does stink, the quality of the algorithms under that ugly UI are very powerful.

DPP 4.x

DPP 4.3.31.0
DPP 4.3.31.0

Someone at Canon got the bright idea to do a whole new DPP from the ground up that had much better support for things like printing, soft proofing, adjustments and more. However, getting parity with the previous version proved to be more than was expected so the new version only works with the latest cameras. What this means is that if you try to open up a CR2 file from an older camera, say a 5D Mark II or 1D Mark IV it may not be able to read the RAW file (although updates are promised – eventually).

While the new UI is better, it still is a far cry from Lightroom or ACR. As a result, I still rely on it for the underlying processing and not the user features.

In theory one should be able to “only shoot RAW” and generate the JPEG’s that would normally be rendered in-camera. Sadly this isn’t the case because the RAW processing done by DPP will use the latest technology vs the camera which uses its firmware – typically with much older processing techniques. However, it can also be frustrating when you see something you love on your LCD only to have to spend a lot of time getting your RAW image to match your CR2 thumbnail file. In fact, I’d argue that the quality of the firmware based processing is often superior to software alternatives.

Comparison

When you zoom in at 100% and compare the layers against each other you’ll notice that DPP 4.3 and Lightroom are pretty close to each other in the way that they process the raw data. The colors are a bit more rich and the highlights aren’t as blown on the DPP 4.3 version, but you have to look carefully to see the difference.

DPP 4.3.31.0 Raw Conversion 100% Crop
DPP 4.3.31.0

ACR 9.2.486 via LR CC 2015.2.1 Raw Conversion 100% Crop
Lightroom CC 2015.2.1 / ACR 9.2.486

In-Camera Default Raw Conversion 100% Crop
In-Camera JPEG

DPP 3.15 Raw Conversion 100% Crop
DPP 3.15

Where things get more interesting is that the old 3.15 version of DPP generates the file that is closest to the in-camera JPEG, but notice how none are identical. This is one of the big reasons why I try to shoot RAW+JPEG whenever I can as I like the in-camera processing since that matches what I saw on the rear LCD. It’s the softest of the image, but it’s typical Canon warm and vivid.

Click here to scroll through larger versions of the images converted in this article.

Notice the different results

If you have a good eye, you’ll notice that all methods result in different images – even if there are some similarities. This is a long running problem because the software in DPP is simulating what the camera does and its constantly being updated. The in-camera processing only changes if the firmware changes, and even then it’s rare for it to change unless there’s a problem. What this means is that you’ll never really be able to take the RAW and generate a JPEG that matches what you saw on your LCD (or CR2 thumbnail).

As a result, if you like what you saw when you were chimping the LCD and you want the option to use that photo, then you’ve gotta shoot RAW+JPG. If you don’t care then shoot straight RAW and just take whatever Adobe, or DPP gives you.

Advice for Canon Shooters

I love RAW and always shoot RAW, but I don’t always need to use the RAW file. For many images the default in-camera JPEG is a perfect starting point for editing. If I did my job right it’s 90%+ ready to publish in-camera. This means I can make some quick edits using my favorite plug-ins then print or publish to the web.

If I screwed up in camera, am printing large or doing commercial work where every pixel matters then to go to RAW. I always have that insurance on hand by shooting the RAW file, and I never delete my raw files.

If I’m not happy with how Lightroom or ACR processes the file so I start by processing the RAW in DPP and exporting it as a 16-bit TIFF using the Wide Gamut RGB color space (Edit | Work Color Space) using the File | Convert and save feature.

Some may also prefer to use other raw processors discussed in the next selection.

RAW Processing Alternatives

Of course there are other RAW converters out there that offer results that differ from the ones above. Some argue they are better, others suggest they are simply doing the technical equivalent of the processing above plus applying their own creative edits to an image up front. Two of the better RAW editors that I’ve used are Piccure+ and DxO OpticsPro.

For completeness I’ve included how a couple of them handled this file as well.

Piccure+ 2.5.0.55

Piccure+ 2.5.0.55
Piccure+ 2.5.0.55 (learn more)

Piccure+ is powerful, but it is painfully slow with the most awful user interaction experience I’ve seen in my 26 years of software development thanks to its lack of a proper save implementation.

I’m told by the founder that the design is optimized for batch operations whereby you choose your project folder up front and then when you work on the file the image is stored there. The problem is that the location where you set your project info isn’t visible when you are doing your file processing so it becomes a mystery as to where your file went. What’s more the way you get back is via the back button which is sometimes replaced by the cancel button which isn’t exactly intuitive either.

Eventually you get used to the user-interface quirks and while it is slow to work, it does a great job. It’s batch mode design can be helpful if you want to give it a bunch of files to process overnight while you sleep, so if you love its RAW conversion then there’s a way to love it without experiencing the pain of processing. 

Here’s how it handled this file:

Piccure+
Piccure+ created a darker, saturated and softer version

At first the image appears oversaturated, but if you look carefully it seems it has done a great job of color balancing the image for the maximum dynamic range and tonal range of each color. The net result is an image that looks visually pleasing without appearing to be overdone – in my opinion.

The default noise reduction and sharpness settings do leave the image softer than Adobe, and Canon typical do, but that can be adjusted to suit your desire. Personally I’d still rather leave the noise reduction to Noiseware after the fact.

DxO OpticsPro 10.5.1.848

DxO OpticsPro 10.5.1.848

DxO OpticsPro has a wealth of powerful features making it act like Lightroom and Perfectly Clear rolled into one. The advantage to this is that you end up with a lot of powerful editing done in one place and it can be saved as a preset for default processing of your RAW images. DxO’s experience with sensors and cameras comes into play to create corrections that promise to minimize the negative effects of noisy sensors and lens distortion / vignetting.

Here’s how it handled this file:

DxO OpticsPro
OpticsPro really brightened up the shadows

DxO does a lot of cool stuff and has noise reduction software that I think is superior to Lightroom and DPP, but still not as good as Noiseware. The image that gets created is pleasing but it is different size than the others so you’ll notice some pixels shifting around if you look at all of the images in the sample gallery.

Conclusion

Click here to scroll through larger versions of the images converted in this article.

Licensing restrictions for this file required me to use a watermark and limit the file size, but it’s still easy to tell what changes between each version when viewing larger files. All images are copyright Ron Martinsen and may not be redistributed, linked or repurposed without written permission.

Personally there’s no wrong way, so this isn’t really a call to action to change your workflow. Instead, it’s about awareness of some things to consider. What’s more, some of the “I only shoot RAW” zealots may find that life is much simpler when you use a little storage space to have the option of using the JPEG for non-critical scenarios (like the 200 shots of your kids or pets), and just process the RAW when they actually need to.

Where to order

SNAGHTML17b57743

I’ve got a special offer for Piccure where you can save 10% when you CLICK HERE and use the coupon code RONMART as shown above (available via credit card only).

DPP comes free with your camera on a CD, but you can also get it off Canon’s website using your camera serial number. Be sure to check out my article entitled Guest Blog: Five reasons to try out Digital Photo Professional by Andrew S. Gibson to learn how to master cool features with DPP.

Adobe Camera Raw can be free if you download the Adobe DNG Converter off their web site, but most people will use it via Lightroom or Photoshop.

DxO OpticsPro (available on Amazon) is the most expensive of the bunch, but it fancies itself as a Lightroom alternative with exclusive features that normally require plug-ins so some consider it a fair deal.

Other articles you may enjoy

If you enjoyed this article, you may also enjoy these:

Disclosure

If you make a purchase using links found in this article, I may make a commission. It doesn’t cost you a penny more, but it does help to support future articles like this.

NOTE: This site requires cookies and uses affiliate linking to sites that use cookies.

If you enjoyed this article, please support future articles like this by making a donation or saving money by using my discount coupon codes. Either way, your support is greatly appreciated!

This blog is intended for freelance writing and sharing of opinions and is not a representative of any of the companies whose links are provided on this site.

The opinions provided are of Ron Martinsen alone and do not reflect the view of any other entity