Wednesday, July 29, 2015

40% Off Topaz Adjust through July 31st

Topaz Adjust ranks high on my What plug-ins should I buy? (for Photoshop & Lightroom) list for a good reason – it’s unlike no any other plugin on the market. For a few days you can get it at a huge discount!

Click here and enter the coupon code julyadjust and be sure to click APPLY COUPON to save 40%. You can also use my Topaz Labs coupon code found on my discount coupon code page to save 15% on all Topaz products anytime. 

Not sure if you need it? Click here to see my review and download the free trial to check it out! Here’s also a cool video that shows you seven tools you need to know in Topaz Adjust to get you up to speed quickly:

Where to order

Click here and enter the coupon code julyadjust and be sure to click APPLY COUPON to save 40%. You can also use my Topaz Labs coupon code found on my discount coupon code page to save 15% on all Topaz products anytime.  Your cart should look like this:

Enter the code and click Apply Coupon 

Other articles you may enjoy

If you enjoyed this article, you may also enjoy these:

Disclosure

If you make a purchase using links found in this article, I may make a commission. It doesn’t cost you a penny more, but it does help to support future articles like this.

NOTE: This site requires cookies and uses affiliate linking to sites that use cookies.

If you enjoyed this article, please support future articles like this by making a donation or saving money by using my discount coupon codes. Either way, your support is greatly appreciated!

This blog is intended for freelance writing and sharing of opinions and is not a representative of any of the companies whose links are provided on this site.

The opinions provided are of Ron Martinsen alone and do not reflect the view of any other entity

Friday, July 24, 2015

REVIEW: Canon 5Ds–Should You Upgrade?(Part II of II)

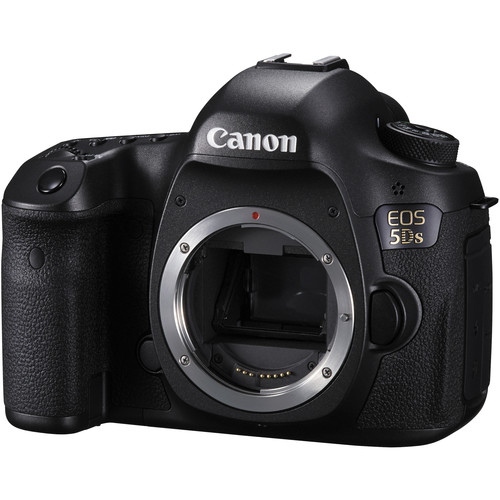
Canon EOS 5Ds 50.6 MP DSLR Camera

If you are just seeing this two part series, please go read the first part of my review entitled Canon 5Ds (Part I of II) with Unedited Sample Photos and come back here for my additional findings.

With a smaller pixel size (4.14µm vs 6.25µm) and diffraction that starts to kick in around f/7.1 (vs f/10), some will argue that the 5Ds only has one major benefit over the 5D Mark III - 2x more megapixels. Given the reality that most users will rarely print a file that full utilizes all 22.3 megapixels of the 5D Mark III (Super B/A3+ - 13x19 inches or 330x438mm), it is true that often those extra megapixels will go to waste – but they’ll still eat up your hard drive space 2x as fast (even more so if you use Photoshop). This begs the question what’s sense does it make to spend an extra $1200 (at the time this article was written) to upgrade?

For some these tradeoffs to take a step backwards from all the benefits the 5D Mark III has to offer. For others the answer to the upgrade question will be based on an emotional desire to have the latest and greatest technology Canon has to offer. The 5Ds certainly comes with plenty of bells and whistles not found on its cheaper sibling, so perhaps that reality alone might be enough for some people.

Read on to get the low down on why I both love this camera, yet I struggle to justify a valid reason to own it.

The 50 megapixel advantage


f/5.6 @ 24mm for 10 sec at ISO 100
 with Canon 11-24mm lens
Click to see the incredible sharpness and detail in this unedited in-camera JPEG image
(Apologies for the tilt)

Does resolution make a difference even when you throw away pixels?

This is the question I kept asking myself so I decided to do a basic test that anyone could do themselves if they had the gear on hand to see the advantage of the extra megapixels.

To begin I just zoomed in to 200% and observed the amount of detail in the bookshelf image taken with the 5Ds using my 11-24mm lens at 24mm at f/5.6 and ISO 100. Notice the dithering pattern in the book spine – that’s really there but only a three cameras I’ve tested have ever captured it – the A7R, D810 and 5Ds:

5Ds Crop from 200% Zoom of Original File

Now If look at the 200% capture of the same section with the 5D Mark III using the same lens, aperture and ISO and notice it is (obviously) smaller and the detail looks smeared by comparison:

5D Mark III Crop from 200% Zoom of Original File

If I zoom in to 300% to get roughly the same size the difference is night and day:

5D Mark III Crop from 300% Zoom of Original File

The 5D Mark III isn’t able to capture the dithering details on the spine or the sharpness of the letters simply because there’s not enough sensor resolution to capture it.

This isn’t rocket science, but it does prove that if you have a lens that can take advantage of the extra resolution then the 5Ds is definitely going to take advantage of it with image details you can use.

Downsizing to 4k

Next I decided to discard the extra megapixels using Photoshop CC 2015’s Image Resizing (and yes, there are better ways like using Perfect Resize) :

Canon 5Ds Image Resize to 4k

Here’s the same thing done to the 5D Mark III image:

Canon 5D Mark III Image Resize to 4k

Below is a table that shows the results (with image links) to before and after, but you can see the results in the screen shots above already. Again, the image with more detail resizes more nicely than the one that doesn’t which also means the file size is larger after resize.


Before Resize

After Resize

Canon 5Ds

8688x5792 15.3MB

3840x2560 6.24MB

Canon 5D Mark III

5760x3840 7.43MB

3840x2560 5.91MB

While this may be proving the obvious to some, it hopefully highlights to everyone that despite the pixel size disadvantage the extra megapixels come in handy when resizing your images.

So YES, even if you end up resizing your image for use on Instagram or Facebook, people WILL be able to see the difference. They won’t be able to quantify it, but the 5Ds images will appear more detailed and sharp.

Editing – The Real High Megapixel Advantage

I’ll admit that I liked some of the advantages of this camera enough that I found myself using it for some formal shots that I’ve had on my to-do list for years. When I edited these shots I really appreciated the extra pixels which helped to give Photoshop more data for gradients, shadow detail, and overall texture. This really made fixing flaws so much easier than normal because tools like the content aware patch and healing tools had more data to sample from.

Here’s an example of an image as it came out of the camera which was quite good even with its 8-bit sRGB in-camera JPEG:


In-camera JPEG Unedited – Click for Full Size
f/9 @ 70mm for 1/125 sec at ISO 100
 using 24-70mm f/2.8L II lens
The best part about a high megapixel camera is editing details as you have so much data to fix flaws with less impact on the adjacent area. The ability to zoom in at a significantly greater level for spot healing.

Anytime I edit a photo I always start with a 16-bit ProPhoto RGB Original RAW file which immediate offers more color and dynamic range than the in-camera original JPEG. Anyone who edits their photos from the RAW originals knows that this RAW advantage still yields benefits when converting an image back to a 8-bit sRGB JPEG for display on the web.  By having the extra megapixels with the 5Ds you get even more visible of benefits from your in RAW editing workflow because you have the well-known color benefits but now you also get more detail even when you downsize your image. Here’s the editing version with all of the benefits that extra megapixels and RAW data offer:


Edited Version - Click for full size
Extra resolution made correcting flaws super easy
and the RAW image had an incredible tonal range
in the background gradients and shadows

This really hit this point home for me because all of the discarded megapixels and color data still resulted in a image that had more color and detail than I’m used to seeing from my 5D Mark III. Yes, you may end up tossing all of those megapixels but the people who see your images will still see the benefits of you shooting with them versus a camera that has less resolution.

Get used to f/7.1 or lower

To avoid diffraction you’ll have to shoot at f/5.6 or less. With a camera that has such high resolution that your depth of field will be drastically reduced, this isn’t good news for landscape photographers. In the real world I found myself satisfied with the tradeoffs of using f/7.1 as you can see here in this long-exposure shot taken on tripod using a timer and mirror lockup:


f/7.1 @ 85mm for 6 sec at ISO 100
using a Canon 70-200mm f/2.8L IS USM 

As I zoom in to 100% and explore on a PA322UHD 4K display I see that I’ve got pretty decent detail of images that the naked eye can’t even notice. Here’s a few fun examples:

100% Crop of Pacific Science Center IMAX Sign
100% crop of Pacific Science Center IMAX sign

100% Crop of Crane
100% crop of crane

100% crop of buildings in the far back section of the shot

This started to feel like the enhance scene in Blade Runner, and made me not really want to live in downtown for a fear of an invasion of privacy by 5Ds shooters!

The super high resolution means that you get more detail at the expense of a a more shallow depth of field, but with landscapes the circle of confusion calculations work in your favor.  If you are a macro shooter, this is going to be a big problem so keep this in mind.

Patient wildlife shooters on a tripod might also be able to take advantage of both the added resolution and generous extra pixels for cropping to get closer to their subjects with high fidelity than they are currently used to enjoying. This is no sports camera, but in skillful hands amazing results are certainly possible.

Bookshelf Test

The following shots are done on a tripod with all camera default settings except I also enable RAW. The full gallery of bookshelf images can be found here, but I’ve included a few noteworthy images in this article.

I’ve already covered the sharpest aperture (f/5.6) at ISO 100 earlier in this review, so I’ll move on to a discussion about ISO. Here’s the same shot taken at the maximum native ISO:


f/5.6 @ 24mm for 1/6 sec at ISO 6400

As you zoom into 100% you can see the noise level (using the Low setting) is pretty bad and the details start to get smeared:

ISO 6400 100% Crop
ISO 6400 100% Crop

For reference again, here’s the same shot at ISO 100:

ISO 100 100% Crop
ISO 100 100% Crop

With the requirement that you have to use significantly faster shutter speeds to get sharp shots hand held, this means you’ll quickly get into high ISO’s like this where the extra resolution benefits start to fade. This is one of the big reasons why I don’t think this camera is going to be for everyone as current 5D Mark III owners will feel like the noise level is a major step backwards.

For the record, this is the same level of noise problem I saw with the Nikon D800/D810, so this isn’t a problem unique to Canon. As a result, I would NOT consider any high megapixels camera like this to be suitable for vacations, parents, travel, concert or street photography.

Real World Shots

The following images come straight from in-camera JPEG’s using the camera default noise reduction settings. Most camera settings are the default with the exception of RAW+JPEG, a desired White Balance (only Shade or AWB), and a desired focus point.  I chose to use the Standard Picture Style for all except for where noted.

Click here for a full gallery of unedited images.

All images are copyright Ron Martinsen – ALL RIGHTS RESERVED. You may not save, print, edit, modify or otherwise use any images featured in this article or the gallery without expressed written permission.


f/5.6 @ 24mm for 1/125 sec at ISO 1600
 using 11-24mm lens
This was one of my many “almost” sharp shots but the slight camera shake despite shooting at over 5x the reciprocal of the focal length. As a result you can expect that hand held shooting is pretty much out of the question for most photographers.


f/5.6 @ 24mm for 1/125 sec at ISO 200

Extreme details, no matter how gnarly, are always fun to capture with this camera


f/5.6 @ 85mm for 1/100 sec at ISO 100


f/5.6 @ 24mm for 25/10 sec at ISO 100

Images like this have to be seen in print or on a 4k display to be fully appreciated
as 1080p just doesn’t cut it – too much detail is lost!

See the first part of my review entitled Canon 5Ds (Part I of II) with Unedited Sample Photos for more images as well as the complete gallery. 

What about other models?

I know many of you are probably wondering about the 5Ds R about now, and I’ll cover that camera when I can finally get my review unit from B&H. I’ve also got a Sony A7R II in the queue will be reviewing it along with the 5Ds R later this year.

Until my my other reviews are ready you can go enjoy these reviews to see what I think of some of the others super high resolution cameras:

I don’t cover medium format cameras on this blog, and I don’t have any other super resolution cameras planned for review at this time (excludes models released after this article was written).

Conclusion

I can highly recommend the 5Ds for those who are doing detail critical work AND who will be using this camera with either studio lights or on a tripod. However I started this article with the question with “should you upgrade”, so I’ll finally go against the fanboys and marketplace momentum and recommend AGAINST getting this camera if you plan to use it as your primary or only camera that you shoot unsupported.

Unless you live in the dessert where you can always shoot at ISO 100 with high shutter speeds, you’ll need shutter speeds that are 3x what you are used to using (assuming you have the latest IS, else 5x+) to avoid motion blur in your hand held images. Extra resolution of blurry images will give you poor results no matter how you slice it as many former D800/D810 owners will tell you. As a result, I consider this a specialty camera for a limited audience or for those who will be using it as 2nd body to back up their lower megapixel Canon DSLR.

This advice applies to the Nikon D810 and Sony A7R II as well. High resolution is both a blessing (when used effectively) and a curse, so “don’t be that photographer” that’s blaming the camera or lens for a bunch of blurry shots that are caused by using a high resolution camera properly. Medium format shooters already know this so when you get to these resolutions you cross into a whole new world that’s not for the beginner or casual photographer! You have been warned.

Where to order

Click here to learn more or order on the 5Ds or 5Ds R on the B&H web site.

Other articles you may enjoy

If you enjoyed this article, you may also enjoy these articles about other Canon products:

Here’s also some other articles on this blog that you might enjoy:

Disclosure

If you make a purchase using links found in this article, I may make a commission. It doesn’t cost you a penny more, but it does help to support future articles like this.

NOTE: This site requires cookies and uses affiliate linking to sites that use cookies.

If you enjoyed this article, please support future articles like this by making a donation or saving money by using my discount coupon codes. Either way, your support is greatly appreciated!

This blog is intended for freelance writing and sharing of opinions and is not a representative of any of the companies whose links are provided on this site.

The opinions provided are of Ron Martinsen alone and do not reflect the view of any other entity

Monday, July 20, 2015

REVIEW: Canon 5Ds (Part I of II) with Unedited Sample Photos

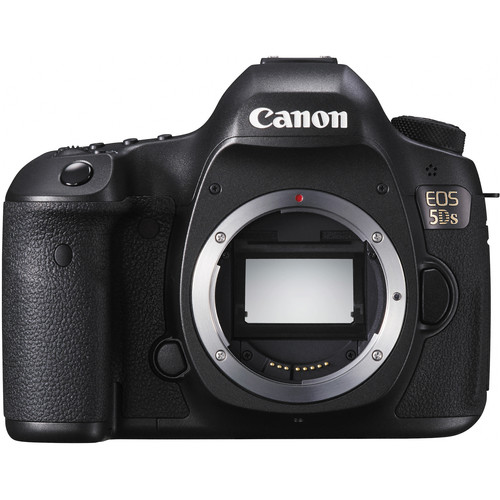
Canon EOS 5DS DSLR Camera

Many of the faithful Canon shooters have eagerly awaited the arrival of the Canon 5Ds and its sibling the 5Ds R (which does without the optical low pass filter like the Nikon D800E and D810). It’s the super megapixel camera that many lust for, but what does it really mean to live with that many megapixels?

50.6 MP is a lot of data for a single image! In fact, this starts to achieve resolutions previously only possible with medium format digital cameras. However, we’ve seen with point and shoot cameras that it’s easy to claim a large number of megapixels only to end up with a disappointing quality image from pushing the sensor too much.

The Nikon D810 and Sony A7R have 36.3 MP which comes out to 7360 x 4912 pixels versus 8688 x 5792 pixels for the 50.6 MP 5Ds. When I reviewed the D800 and D810 I complained about the challenges of having too many megapixels because it makes it so much easier to get blurry shots or miss your focus target due to a much shallower depth of field. The 5Ds is even more guilty of the problems than the Nikon D810, so I still urge my readers to understand that this is NOT a camera for everyone. In fact, I’d argue that for most this camera makes more sense as a secondary camera for use on a tripod or using studio lights only.

You’ll need more than just a new camera

With JPEG’s as little as 7MB to as many as 27.8MB and RAW files ranging from 48MB to as high as 88MB, you are going to need a ton of space just to store your images. If you use Photoshop then an edited file with roughly 7 layers will take up 1.25GB, so this camera will eat up your storage space in a hurry!

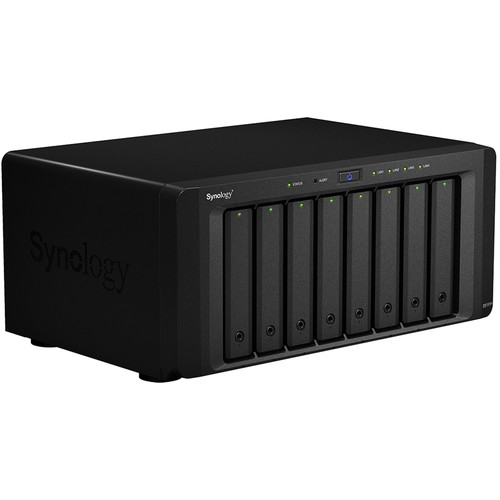
Synology DiskStation DS1815+ 8-Bay NAS Server

I use a Synology 1515+ for my storage needs plus a ioSafe DS1515+ (review includes Synology details) for data protection (as mentioned in my Scott Kelby article), but if I had one of these cameras I’d probably need to upgrade to the 8-bay version shown above. 

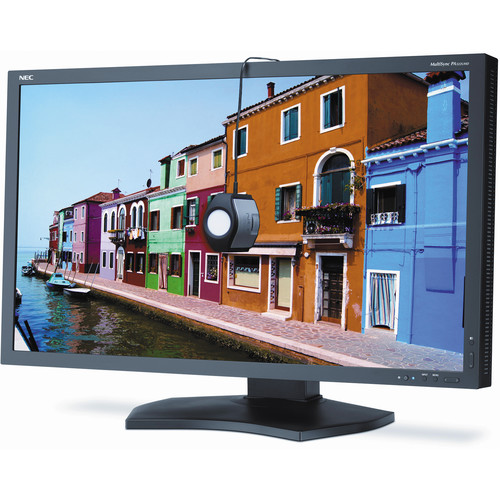
NEC PA322UHD-BK-SV 32" Widescreen LED Backlit Color Accurate IPS Monitor with SpectraViewII
NEC PA322UHD-BK-SV 32" Widescreen LED Backlit
Color Accurate IPS Monitor (Shown with SpectraView II)

What’s more, with images that are 8688 x 5792 pixels a typical 1920 x 1080 (or even 1200) pixel display doesn’t cut it. As a result an investment in a UHD display that can do 3840 x 2160 (aka 4k) is incredibly helpful for seeing your images as they really are meant to be displayed. I use the NEC PA322UHD shown above, and many opt for the Apple Retina 5k display but I much prefer the NEC PA series.

Real World Samples

The following images come straight from in-camera JPEG’s using the camera default noise reduction settings. Most camera settings are the default with the exception of RAW+JPEG, a desired White Balance (only Shade or AWB), and a desired focus point.  I chose to use the Standard Picture Style for all except for where noted.

Click here for a full gallery of unedited images.

All images are copyright Ron Martinsen – ALL RIGHTS RESERVED. You may not save, print, edit, modify or otherwise use any images featured in this article or the gallery without expressed written permission.


f/9 @ 70mm for 1/125 sec at ISO 100
 using 24-70mm f/2.8L II lens
Unedited – click for the full-size in-camera JPEG
Details in the texture of the suit and tie plus the background gradient were all advantages that the 5Ds offers thanks to the extra resolution which takes advantage of super sharp lenses


f/2.8 @ 63mm for 1/125 sec at ISO 125
using 24-70mm f/2.8L II lens
Using freehand is hard, but if you pull it off the more shallow depth of field of this camera means significantly better blurring of the background than you’d find with a 5D Mark III


f/2.8 @ 50mm for 1/125 sec at ISO 100
 using 24-70mm f/2.8L II lens
The problem is that most shots will look like the one above which upon close inspection is very blurry around the eyes. This happens due to camera shake which is much more easily registered in the image in high megapixel cameras


f/5.6 @ 24mm for 7 sec at ISO 100
 using 24-70mm f/2.8L II lens
Fireworks are great, but the added megapixels means that viewing the full image unzoomed on anything less than a 4k display will result in jaggies for the fine details of the streams in the fireworks. This can happen on lower resolution printers too, so honestly I don’t care for high megapixel cameras for fireworks.


f/4 @ 19mm for 1/160 sec at ISO 800
 using 11-24mm lens
I was expecting to see great dynamic range, but instead I got worse than 7D Mark II performance


f/4 @ 19mm for 1/125 sec at ISO 1600
 using 11-24mm lens
The new 11-24mm is a dream with this camera as it preserves the sharp details


f/4 @ 16mm for 1/30 sec at ISO 1600
 using 11-24mm lens
Again, once you get lots of details you start gets lots of artifacts when downsizing all of those megapixels as shown here in the organ tubes


f/4 @ 17mm for 1/40 sec at ISO 1600 using
11-24mm lens
At first I thought this camera had pulled off a miracle for the stained glass vs the statue exposure, but then I saw shot below which reminded me that this one was taken on the dark side of the church


f/5.6 @ 13mm for 1/20 sec at ISO 1600
 using 11-24mm lens
(In-Camera HDR Composite – see base exposure here)
Even a three frame, 1ev HDR image (in-camera) couldn’t get this shot which really disappointed me. This is definitely less than the range you’ll see with the D810 and A7R.


f/5.6 @ 15mm for 3.2 sec at ISO 100
 using 11-24mm lens
This notoriously difficult shot did well capturing all of the detail, but the long exposure noise reduction destroyed the detail in the hair and pants which was disappointing


f/9 @ 22mm for 1/80 sec at ISO 100
 using 11-24mm lens
Again, this is a tough exposure but I had higher hopes this camera could pull it off – it didn’t due to less than amazing dynamic range.


f/5.6 @ 70mm for 1/100 sec at ISO 100
using 70-200mm lens
The extra megapixels shown their value with the incredible detail in the rocks. This is why I do recommend higher megapixel cameras for landscape photographers using tripods


f/5.6 @ 24mm for 1/1250 sec at ISO 100
 using 11-24mm lens
I pulled over to capture these amazing clouds but got results
that weren’t much better than my iPhone 6 unfortunately

Click here for a full gallery of more unedited images.

Conclusion

Click here to read my conclusion and additional findings in part II!

Where to order

Click here to learn more or order on the B&H web site.

Other articles you may enjoy

If you enjoyed this article, you may also enjoy these articles about other Canon products:

Here’s also some other articles on this blog that you might enjoy:

Disclosure

If you make a purchase using links found in this article, I may make a commission. It doesn’t cost you a penny more, but it does help to support future articles like this.

NOTE: This site requires cookies and uses affiliate linking to sites that use cookies.

If you enjoyed this article, please support future articles like this by making a donation or saving money by using my discount coupon codes. Either way, your support is greatly appreciated!

This blog is intended for freelance writing and sharing of opinions and is not a representative of any of the companies whose links are provided on this site.

The opinions provided are of Ron Martinsen alone and do not reflect the view of any other entity

Friday, July 17, 2015

Ron’s Photography Gear Recommendations–2015 (UPDATED: December 7, 2015)


CLICK HERE to see the 2016 replacement for this article


Bugs and flowers macro shots are often what get most people seeking something more than their cell phone
Bugs and flowers macro shots are often what get
most people seeking something more than their cell phone

Last year one of my readers asked me to draw a line in the sand and create a page where I list out my honest to goodness recommendations of what gear I’d recommend to a close friend or family member. While there are a lot of great products and various circumstances which dictate why one product might be better than another, I’m going to base this article off what I would buy if I were spending my own money at full retail price on myself or a close family member.

If you are offended by this article, please read the conclusion before taking your next steps. If you feel like leaving a comment then please note that only one comment with the same text is necessary. You WILL NOT see your comment until it is approved and comments with links and flames will be auto rejected by my assistant.

DSLR Gear

Capturing our active children is another big reason people seek out better camera gear

Canon, Sony, Nikon and Fujifilm all make great products and there’s a lot to love about them. I’m a Canon shooter, but I think the Nikon D4s is by far the best overall camera on the market – period. However, when I pick a camera platform there are a many things to consider above and beyond megapixels, ISO performance or the current generation camera features. For a variety of reasons, here is what I would buy if I was starting all over again today without any lens investment:
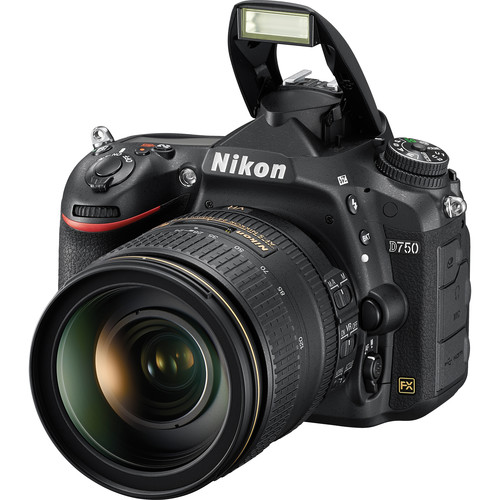
Nikon D750 DSLR Camera with 24-120mm Lens
Nikon D750 DSLR Camera
(review)

Yes, I love the Sony A7R Mark II, Nikon D610 and Canon 5D Mark III a lot but Nikon raised the bar with this camera. People who are buying DSLR’s these days typically already own a cellphone that takes decent images and often a smaller form factor camera that are more capable than most entry level DSLR’s. As a result, the investment in a DSLR these days is by either a working photographer or someone who really wants a high quality image with a wide dynamic range and low noise at high ISO’s. This camera does all of that and features a pop up flash which works in a pinch as well as dual memory card slots that are a must for the event/wedding and sports photographer. While I think Canon still has a much stronger lens line up, it’s hard to deny that this is one of the best sensors in a DSLR on the market today.

Runner Up
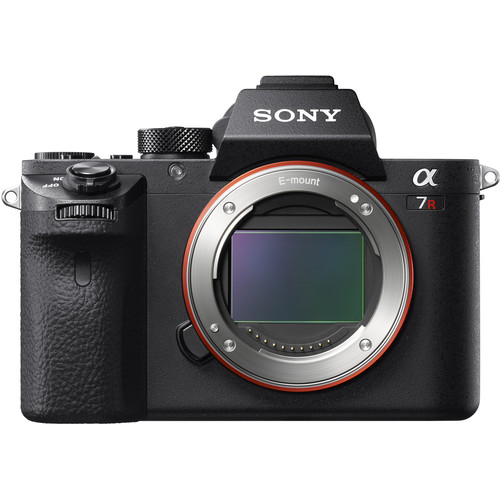
Sony Alpha a7R II Mirrorless 42MP/4k Video Digital Camera
Sony Alpha a7R II Mirrorless 42MP/4k Video Digital Camera (review)

In terms of dynamic range, I have not tested any camera that has performed better than the the Sony A7R Mark II. Shadow areas that would typically be pure black and highlights that would be overexposed, are often perfectly exposed. It can’t overcome the impossible, but as you see in the shot below (especially when you click to view the full-size original) there’s plenty of details to be found in the shadows that are easily recovered with the RAW, and only the powerful LED lights are overblown:


f/4 @ 25mm for 1/125 sec at ISO 5000

Nighttime at ISO 5000 and the noise is tolerable.
What really impressed me though was that it didn’t completely blow out the lights (outside the main beams) yet the detail in the grill shadow areas is still excellent

Honorable Mention

Until the D750 was in my hands for review, the 5D Mark III was my favorite camera on the market. While I still think it’s a fantastic camera with a much better lens lineup than Nikon, its excellent sensor is now behind Nikon in terms of high ISO performance and dynamic range.
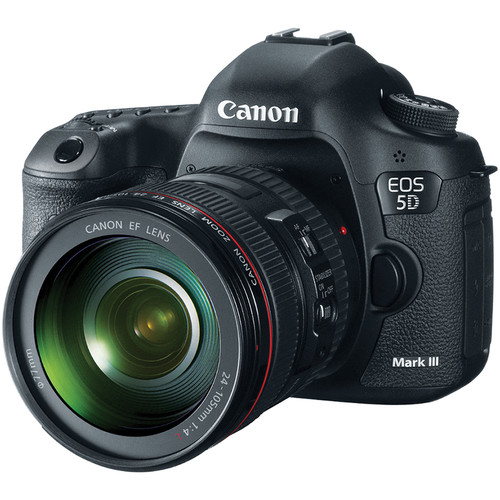
Canon EOS 5D Mark III DSLR Camera Kit with Canon 24-105mm f/4L IS USM AF Lens

When I weigh in all of the features and user experience combined with the results I get straight out of the camera, it is hard not to love this camera. The metering and color of the in-camera images are fantastic, and the video is Hollywood worthy. The in-camera HDR feature keeps the source images and aligns the merged image very well has encouraged me to use HDR more often and more effectively than bracketing alone (or systems that discard the originals). The AF system is as advanced as my 1D X and there’s just a ton of goodness that make this the perfect camera for weddings, events, concerts and parents. Yes, the are categories where other cameras might be superior, but when I look at it holistically this is still my one of favorite DSLR’s on the market. Yes, the D750 has a better sensor and matches most of its features, but I still find Canon’s menus much more user friendly.

You’ll also notice that I chose the kit here and the reason is simple – the 24-105mm offers a great focal range for everyday shooting – especially when traveling, the IS is very good and the images are sharp enough. Yes, I bought the new 24-70 f/2.8L II because it’s sharper, but I couldn’t get myself to sell my 24-105mm because I just love that focal range. As a result, I have both and still elected to use the 24-105mm as my primary lens during a three week trip to Asia.  I seriously considered getting the 24-70mm f/4L IS to replace my 24-105mm because it’s sharp and has an awesome macro mode, but ultimately it’s the reach that keeps me reaching for what is now my oldest and softest lens in my kit. Both 24-70’s will please the pixel peepers who strive for the ultimate in sharpness, but when it comes to real life I still like the 24-105 and it’s a fantastic deal (remember, I said I’d be spending my own money here).

Everything Else
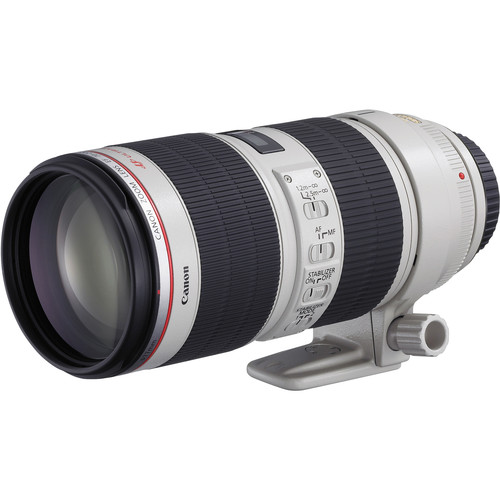
Canon EF 70-200mm f/2.8L IS II USM Lens

People often ask me, if I could only have one lens which one would it be. Without hesitation, I have to say the 70-200mm f/2.8L IS II USM for it’s razor sharpness, amazing bokeh, fantastic image stabilization and super fast autofocus. I’ve shot tens of thousands of shots with both Canon and Nikon’s best cameras using the 70-200mm f/2.8 from both camps, and hands down the Canon is my favorite – period. 200mm at f/2.8 is my favorite setting when photographing people (with ideally my subject being 6’ or more away from any background objects), so this is my go to lens. Sure I’d love to be able to buy the 200mm prime or the amazing 200-400mm, but I’d only get them in addition to not instead of this incredibly flexible lens.

And for those who are wondering, no I wouldn’t even consider the excellent 70-200mm f/4L IS. While it’s a great lens, what I love is the bokeh that I get at 200mm using f/2.8 and that’s worth every ounce of extra weight and price.  

For Nikon shooters I find that the Nikon AF-S 24-70mm f/2.8G ED and Nikon AF-S 70-200mm f/2.8G ED VR II (or Nikon NIKKOR AF-S 70-200mm f/4G ED VR) are great investments that should be in every Nikon shooters bag.

The Fujifilm XF 50-140mm f/2.8 R LM OIS WR Lens (review) – a fixed f/2.8 aperture equivalent coming at 35mm equivalent of 76-213mm is a great choice for those looking for a lens like this on that platform.

For Sony users I don’t have a good recommendation yet which is why it wasn’t my first recommendation for cameras. While Sony recommends the Sony FE 70-200mm f/4.0 G OSS Lens for its E mount camera, I have heard rumors that the Canon 70-200 with an adapter produces better results. Until I’ve tested this with my own hands, I can’t recommend anything in this range for Sony.

Sigma 50mm f/1.4 DG HSM Art Lens
(review)

For years I bashed third party lenses, but times have changed and the Sigma 50mm f/1.4 DG HSM Art Lens is one of the most memorable third party lenses I’ve tested. Even against the mighty Otus 55mm it left me impressed, so I can comfortably recommend this affordable lens over any other option on the market.

Simply put, if you camera can mount this lens then I can’t imagine anyone who wouldn’t be happy with the results you get.

Click here for a complete list of my lens recommendations including Nikon.
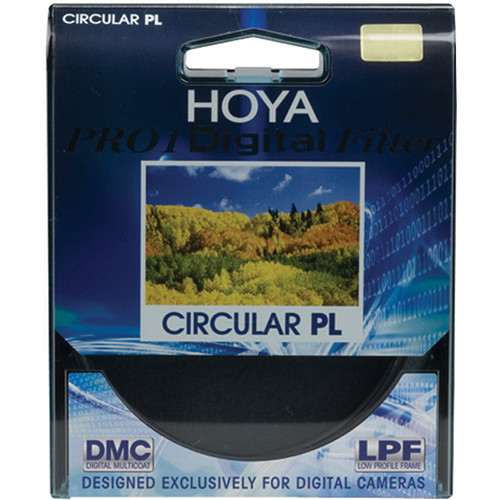

Hoya 77mm Circular Polarizing Pro 1 Digital Multi-Coated Glass Filter

There’s still one and only one thing that you can’t simulate in post-processing that must be done in-camera and that keep the light you want and block unwanted polarized light. This helps eliminate reflections, certain glare and haze and generally makes a scene look more naturally vivid. Colored and UV filters are a waste of money, but this is a staple everyone should have. It should be noted that the size you get depends on the lens you are using, but the 24-105mm and 70-200mm f/2.8 lenses I’ve recommended above both require a 77mm filter.


B+W, Bower, Hoya, Singh-Ray & Tiffen VariND  Filters

If I had spare change, I’d also pick up a variable neutral density filter, but not before pretty much everything else I’ve listed in this section.
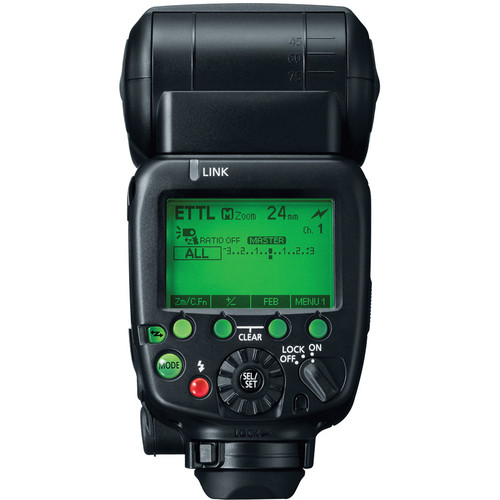
Canon Speedlite 600EX-RT Essential Two Flash Wireless Kit

At a minimum, I’d get one Canon 600EX-RT flash (not for Nikon) which I consider to be another big reason to choose Canon as a platform. Yes, my friend Joe McNally does amazing stuff with his SB-910’s, but only a Nikon diehard would say they are easy to use. I much prefer the easy to use menu which can set all the flash features via the camera LCD and the radio controlled wireless feature that eliminates the need for Pocket Wizards. If I had to do it over again, I’d just get the kit above with two flashes and the ST-E3 RT all in one shot. It’s a big up front investment, but it’s worth it.

Of course all that advice only applies to Canon shooters, so if you are in the Nikon camp then an investment in the SB-910 is a sound one. I much prefer it over the SB-900 which had a history of problems including overheating. The SB-900 is just as effective as the 910, but the SB-910 is more robust. Now Nikon may catch up, based on early reports about the the SB-5000 & WT-6, but for now they are just a convenient pre-holiday announcement with no real details..

If I were going to spend more money on lighting gear, then I’d complete my kit with the following:

StreetWalker® Pro Camera Backpack StreetWalker® Pro Camera Backpack

I’ve owned over 50 camera backpacks, but if I were going to only have one then without question it would be the ThinkTankPhoto StreetWalker Pro. I’ve had mine since 2008 and despite testing so many bags, it’s still the one I reach for the most.  The reason why is that it is very deep (the pics on the web don’t do it justice), it’s durable and super comfortable. I’ve packed up to 45 lbs in mine and even with my bad back it’s not been a problem with all day use.

When I have to haul a lot of gear I will generally use my Think Tank Photo Airport Security v2.0 as I love being able to roll my bag, but if I’m in a crowd I can throw it on as a backpack. It’s a killer combo that has made this the 2nd most used back in my collection.

I’d probably pick up these accessories too when I could afford them:

DSLR Alternative

Compact cameras often mean you have your best camera with you to capture special moments
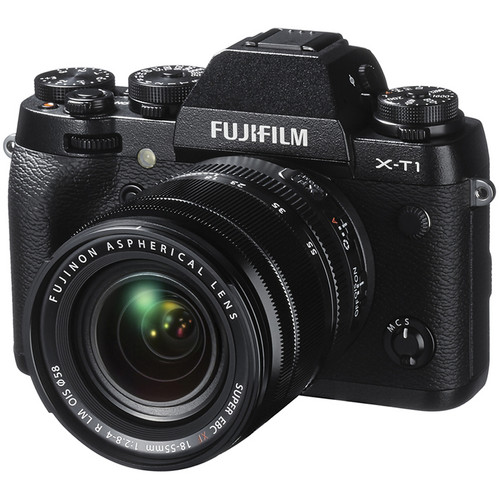
Fujifilm X-T1 Mirrorless Digital Camera with 18-55mm Lens Fujifilm X-T1 Mirrorless Digital Camera with 18-55mm Lens

I was harsh on the X-T1 in my review due to the horrible selector buttons, but the apparent solution to the problem in the form of a feature upgrade or new model could sway me to sell my X-E2 in favor of Fujifilm’s flagship camera body. I’ve put my money the X-E2 for now, but I’d definitely get a X-T1 if the selector button issue was addressed. Users with the newest manufactured units say that they aren’t as bad as what I reviewed, but the X-E2 design would still be my preferred choice.

Yes, the Sony a7R was fantastic with one of the best sensors I’ve seen to date, but for this class of camera I still prefer the usability and in-camera results of the Fujifilm over Sony. This might change after I review the a7RII so check back after I review it for my latest advice.
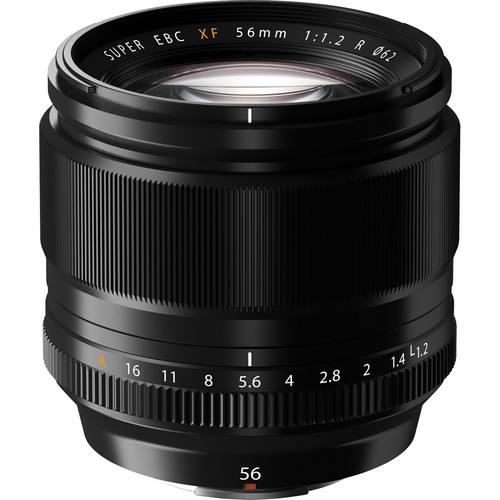
Fujifilm XF 56mm f/1.2 R Lens Fujifilm XF 56mm f/1.2 R Lens

In my Fujifilm XF 56mm & XF 10-24mm Lens Review I said I’d go for the 10-24mm for my personal needs, but I’ve hesitated because I’ve missed the 56mm so much. However, if I had the kit lens I’d probably opt for the 56mm prime (which is an 85mm effective) because I loved the results I got from it so much.

Think Tank Photo Mirrorless Mover 30i Think Tank Photo Mirrorless Mover 30i This bag is MUCH smaller in real life than this photo makes it seem and that is a GOOD thing! It’s about the height and width of an iPad

90% of the time I carry my X-E2 and lenses in my Mirrorless Mover, but occasionally I’ll want to go super light and I’ll use my Turnstyle bag.

Point & Shoot

Even a Point and Shoot can get great images when you are on vacation Even a Point and Shoot can get great images when you are on vacation

Try as we might, we still have to carry a point and shoot for times when the main camera is too huge. For many their point and shoot will be their cell phone, and honestly it is for me quite often too. However, I’m not going to a special place like Disney with just a cell phone. When I want something that is compact but not super expensive and bulky, I reach for my point and shoot.
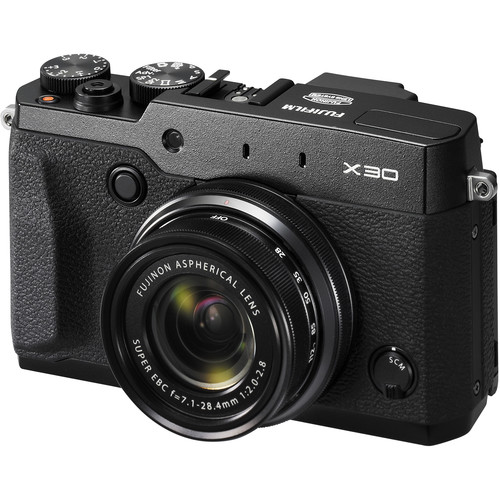
Fujifilm X30 Digital Camera (Black) Fujifilm X30 Digital Camera in black, not scratch easy Silver

I was a huge fan of the x10 and the Sony RX100 IV (review) has the best small camera sensor on the market, but the real world ease of use and price makes the Fujifilm x30 my camera of choice. Yes, RX100 IV is better, but it’s nearly $1000 price is pretty hard to swallow since it approaches DSLR range. There are enough improvements in the IV that I prefer it over the RX100 III. The Fujifilm defies logic with its high keeper rate in real world usage, yet has enough features to make me want to pull it out instead of just reaching for my trusty iPhone 6s Plus (which is nothing to sneeze at either). 

The G16 impressed me when I did my Canon G16 vs s120 & Fujifilm X20 comparison, but when I had to spend my own money I still stuck with the x20 for my families needs.

I love my iPhone 6s Plus and highly recommend it, but cameras of this class still have value over the best cell phones for the control they offer when taking shots that require more than just a simple point and shoot (i.e., thinking about shutter speeds, aperture, ISO, etc…). This makes them the perfect camera for things like Disney and big theme parks.

BlackRapid SnapR Camera Bag BlackRapid SnapR Camera Bag

For the little camera, my wife purse is often the best bag. However, when I carry it alone I use the BlackRapid SnapR Camera Bag which includes a sling strap.

Photo Editing Software

Adobe Photoshop Lightroom 5 Software for Mac and Windows Adobe Photoshop Lightroom Software for Mac and Windows

If I could only have one piece of software, it’d have to be Lightroom. I simply couldn’t live without it. Yes, I suppose if I only bought Photoshop then I might be inclined to suffer with just Bridge, but given the fact that Photoshop requires Creative Cloud now you’d get Lightroom so you’d never have to limit yourself to just Bridge anymore. For some, this will be all you need as Photoshop may just seem like overkill for you. If you long for more without much complexity then consider a nice set of Lightroom presets and call it done.

Good gear and postprocessing can lead to images that exceed your memory of a special occasion Photoshop can help you take a good image and make it great

Personally, I can’t live without Photoshop so I’d have to do the $9.99/mo Photoshop & Lightroom bundle that Adobe offers.

Complete Collection ronmart 250x250

If I was starting over or advising a friend I’d steer them towards the Topaz Labs Complete Collection as their first purchase, as it offers the best line up of products on the market. I’d suggest Noiseware as their second purchase and Portraiture as their third.

If someone asked me what to use for HDR, then I’d definitely go with Aurora HDR if they had Mac otherwise Photomatix and Trey’s new Complete HDR Tutorial.

For getting the most out of my photo editing, I’d suggest a X-Rite i1Display Pro if you didn’t get the colorimeter bundle with my recommended photo editing display, the NEC PA242W (or PA322UHD 4k display if you can afford it).

Finally, your photos have to go online somewhere so for that job my favorite is still Zenfolio over my longtime favorite in the past, Smugmug.

Please keep in mind that I have discounts for most of these products and more on my discount coupon code page.

Books

Scott Kelby's Digital Photography Boxed Set, Parts 1, 2, 3, and 4, Updated Edition would still be my choice for the newbie just getting started as well as some Bryan Peterson Books like Exposure Solutions or his Field Guide.

For photo editing, The Adobe Photoshop Lightroom CC Book for Digital Photographers is a must and if you have Photoshop then The Adobe Photoshop CC Book for Digital Photographers is my favorite after you’ve learned the basics.

Training

With the right equipment and instruction, you can make images like this too With the right equipment and instruction, you can make images like this too

KelbyOne is the best value for photography and photo editing training bar none. With fantastic videos from some of the best photographers and photo editors in the business, you can’t beat it.

For more hands on training with an instructor online, then consider Bryan Peterson’s BPSOP (formerly called PPSOP).

I also offer classes and workshops so contact me if you are interested in my training opportunities or a portfolio review.

Conclusion

Your path may just beginning but remember to enjoy the journey!

There are a lot of fantastic products on the market, so if you are the person who likes to comparison shop then I encourage you to do your own research before purchasing. This article was written specifically for those people who ask me “just tell me what to get” because they want advice from a trusted source, not a million articles to read.

For some readers these choices may not be the best for you. For those who wish for a deeper analysis of what to consider, please don’t be upset by my terse recommendations here. Instead, please consult the articles listed below and the right side of this blog which contains an index of most of my articles. There’s also many other great sources on the web like DPReview & The-Digital-Picture, SLRGear.com and more. Second opinions are encouraged, but if you found this article helpful please support this blog by coming back here and using my links or making a donation when you are ready to order!

This is by no means a comprehensive list. Just look at what’s in my bag (which is very outdated) to see that I’ve got a lot more than what I list here. There’s also tons of great products like studio lights and from great companies like Expoimaging that aren’t included. I just wanted to keep this article from being too overwhelming now, so you can read the articles on the right for more details on what I think of a lot of great products on the market.

Where to order

Please empty your cart and use the links found in this article when placing your order. If you’d like to make a purchase from a retailer not linked in this article or you think you’ve found a better deal elsewhere, please contact me and I’ll see what I can do to get you a link for your preferred retailer.

Other articles you may enjoy

If you enjoyed this article, you may also enjoy these:

Disclosure

If you make a purchase using links found in this article, I may make a commission. It doesn’t cost you a penny more, but it does help to support future articles like this. If you can’t use my links then please consider a donation if you found this article helpful.

NOTE: This site requires cookies and uses affiliate linking to sites that use cookies.

If you enjoyed this article, please support future articles like this by making a donation or saving money by using my discount coupon codes. Either way, your support is greatly appreciated!

This blog is intended for freelance writing and sharing of opinions and is not a representative of any of the companies whose links are provided on this site.

The opinions provided are of Ron Martinsen alone and do not reflect the view of any other entity