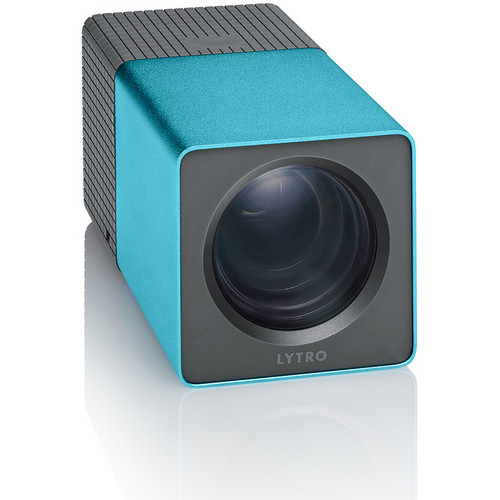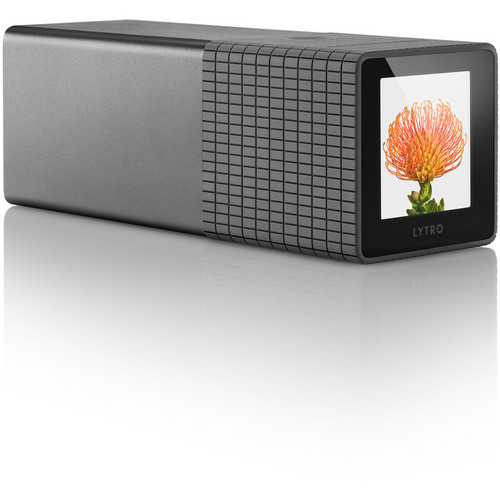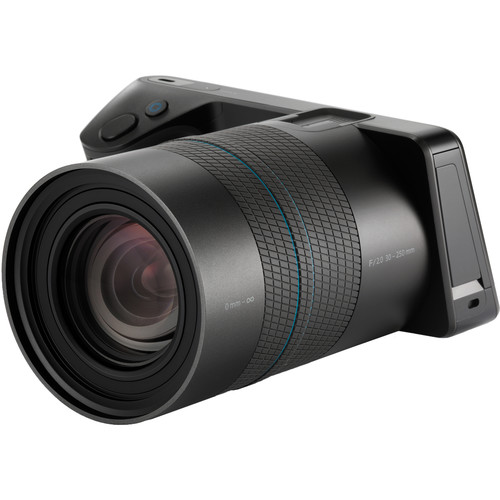
Lytro Illum Light Field Digital Camera
No you aren’t experiencing déjà vu, I’ve re-released this article with some new content instead of doing the typical part II. If you are just joining me then there’s no reason to read the previous article as it just points to here now.
Intro
I’ve been very interested in Lytro’s light field cameras since I first read about them a few years back. Once I saw the NFC championship game shot with the Illum I reached out to the company and my B&H rep and got a couple models sent out to me.
In this review I share my findings on both the camera as well as the software required to process its images. I found myself really loving and hating various things about this camera along the way, so if you’ve been interested in this camera I think you’ll find this review very helpful.
Why Take 2?
In my first attempt to review this product I did so blind without any feedback or influence of any third party. I did get some tips from my friend Stephen Eastwood while at WPPI, but my goal was to try to get an unbiased and untainted opinion of this product. The problem with doing this is that this product assumes you’ve invested a lot of time doing your research on light field technology and that you’ve watched these excellent videos on their web site:
Sadly, that’s a geek way to release a product because in the 25 years I’ve been delivering technology products to customers I’ve learned that when you assume you make an ass of u and me. As a result, I messed up and failed to review and use this product to its maximum intent – as a device that generates 3D images.
Make no mistake, this camera is NOT a DSLR or mirrorless replacement. As a 2D camera it is not as good as a typical modern day cell phone, but when used properly it can deliver a video or interactive image (via the Lytro viewer) that creates a cool 3D image. This is why Lytro emphasizes the term “living pictures” in their advertising because it’s more than just a static 2D image. With this in mind, read on and learn..
Understanding how to view images in the Lytro viewer
A video is worth a thousand words to explain how to make the most out of viewing a living image from a Lytro Illum camera:
When click on the image and you spin your mouse around in circles you are playing with the perspective shift which gives the illusion of a 3D image without the need of 3D glasses. You can however export real 3D images and video for later viewing on your 3D playback device, but I like this quick and dirty way of doing it. Here’s one you can play around with:
or CLICK HERE to visit a gallery which contains much better content than what I made. You can also see the users stream of images that have been recently flagged as cool by the Lytro team. These are just ordinary users content that has been marked as public and flagged for your enjoyment.
The photos of successes and failures can be found here. Anything that doesn’t refocus or have the 3D effect is basically a failure on my part, so live and learn.
One of my Favorite Photographers, Stephen Eastwood also has a gallery here with some images for your enjoyment like this:
Unfortunately the online viewer doesn’t show the EXIF for the images and it only allows minimal captions.
Using the Lytro Illum’s Depth Assist Features
The original Lytro 8GB was pretty bad because you had a tiny screen with no ability to see the depth and refocusable regions when you were out shooting. The Illum is the significantly better because you have the ability to see to control the refocusable regions in the foreground (blue) and background (orange) in real time. Here’s a short video I did that shows it in action:
I asked a support engineer at Lytro for his feedback on the video and he gave me the following notes about the video:
- Correction: at about 2:10, you move the foreground subject to the plane of the background subject and say that if both are in orange the image would be out of focus. This is incorrect. They will be in focus, but will just both be at the same depth level. Now, if you move them both into the gray area, then they will indeed be outside of refocusable range.
- The orange and blue area that I point to on the right side of the LCD in the video is called the Depth Histogram, whereas when I press the Lytro button the blue and orange that show up is called the Depth Overlay.
- Refocusable range - Subjects anywhere within the orange/blue range
- Non-refocusable range - Subjects outside of the orange/blue range (in either of the gray areas)
- The LCD screen articulates [Ron: While true, the reality is that outdoors in bright light the articulation doesn’t help you. I intentionally had reflection in the video just to demonstrate point that it is a highly reflective LCD with no electronic viewfinder]
When everything is all blue or all orange that means that everything is at the same depth level. For the most interesting photos, you want objects in both the orange and blue as I demonstrate in the video.
Unfortunately I wasn’t able to re-shoot the video due to time constraints surrounding the return of this camera.
Here’s the living picture created during the video above:
For reference, this is what the refocusable regions looked like in Lytro Desktop:

Lytro Illum Depth Map with Refocus Region
Blue objects are close and orange objects are far
and here’s what the actual depth map looked like for this photo:

Lytro Illum Depth Map
Dark objects are close and light objects are far
When you have this camera in your hands and discover there’s no aperture and there’s no traditional concept of focusing then it can be rather stressful. However, if you take the time to read the manual and watch the videos, you’ll understand that you just have to learn how to think a little differently. Instead of paying attention to a single focus point you end up paying attention to the Depth Histogram as previously discussed and shown here:

Depth Histogram and Depth Overlay
Hopefully this gives you a better idea of how to use this camera because there’s a common misconception that you can “just focus after the fact”. In fact, as you see in the video there’s work that must be done in-camera to give you the opportunity to do that in post processing, so in many ways this camera is much more challenging than a traditional camera where focus only needs to be set on one dimension. As a result, this isn’t a point and shoot camera for amateurs, but rather a bleeding edge technical device for patient photographers who are willing to invest additional time at capture time to meet all of the requirements to make an interesting living picture.
Not Recommended for 2D Images
This is NOT a landscape camera or a DSLR replacement! Here’s some great examples which for reference sake illustrate the out of camera 2D quality of the images (click for full-size) as well as show the range of zoom on the built-in 30 – 250mm fixed f/2 aperture (non interchangeable) lens:

Zoomed Out to 30mm - Exported In-Camera JPEG - No Edits
As you can see from these two images they go both wide and far, so the zoom range is very handy. Sadly the image quality as a simple 2D camera is unimpressive as the images feel soft and the color is only mediocre (before RAW processing).

Zoomed In to 250mm - Exported In-Camera JPEG - No Edits
While more post-processing in Lytro Desktop is possible, it feels like it was taken with a cheap lens and old camera (or a mediocre cell phone). By comparison, an iPhone 6+ native image is 3264 x 2448 pixels at roughly 1.75MB.
To get a proper file out of these these big 50MB Lytro RAW light field images it is best to export as TIFF. This gives you a roughly 15MB image in the ProPhoto RGB color space, yet really isn’t going to be print worthy.
It should be noted that you can get 100MB XRaw images that contain calibration data, but that generally is only needed when you know you’ll be giving a photo to someone else who doesn’t have your camera calibration data. You’ll have this when you setup your system so you DO NOT need this huge file format as it contains the EXACT same light field data as the smaller RAW files.
Benefits of a Light Field Camera
Lytro.com list the following benefits of a light field camera:
Unlike a conventional digital camera, the LYTRO ILLUM captures the light field, which includes the direction of light.
Capturing this fundamentally new data gives consumers unprecedented capabilities, including the ability to focus, change the perspective, change the aperture, and view in 3D - all after a picture is taken.
This was the concept that captured my imagination from day 1 as I had seen this technology demonstrated by researches at other companies, but never did I imagine it would be an affordable and shippable product so quickly.
From the first moment I got this camera, I was eager to do a flower shot where I could have fun with various focal points and apertures after capture time. I finally got my chance in Palm Desert, California earlier this week. Here’s an unedited shot straight out of the camera:
The nice rubber grip and view through the LCD immediately inspire confidence in its quality, but I’ve been very disappointed when I’ve viewed the images on my NEC PA322UHD 4k display. I quickly discovered that it’s best to view the images on a WUXGA or 1080p resolution display like a PA242W as the images look a lot better when smaller.
Living with the Lytro Illum
For the purpose of this discussion, here’s a quick overview of the rear LCD of this camera:

Touchscreen layout in Capture Mode
Here’s what each section is called:
- Image View Area
- Depth Assist Bar
- Menu Bar
- Information Bar
It should also be noted that there’s a kind of undiscoverable feature called Spot Depth Feedback that allows you to check the distance from the camera to the object at the center of the live view. I forgot to cover this in my video, but if you are considering or own the Illum you might find this article handy.
Say good bye to Aperture Priority
When you think about the fact this is capturing a light field, it makes sense, but there is no concept of setting aperture on this camera. It’s got a fixed f/2 lens and all images are shot at f/2. While this might make you panic at first, the reality is that because this is a light field camera aperture can be set from f/1 – f/16 after the fact.
With this reality, it means you are primarily concerned with your ISO and shutter speed because the focus point “in theory” can be set later. As a result this camera has a Program Mode, ISO priority mode, Shutter priority mode and Manual mode where you have manual control over ISO & Shutter Speed (which is very similar to a DSLR Shutter priority when Auto ISO is off). These are set via the Menu Bar (#3 in the graphic above).
In good light, like I had in California, you’ll need to be at the minimum ISO 80 and I often found myself at the maximum 1/4000 sec shutter speed. Coming from Seattle, I don’t find myself using shutter speeds that fast, but I quickly discovered that in bright sun there is value in having a camera that can do 1/8000 sec (like my Canon’s). With a lens that will only do f/2 at capture time, some shots just get blown out due to the constant f/2 lens aperture. Other shots, like the one below are uninteresting because you can pretty much only set them to f/16 in post processing as there’s little variation possible in such bright light:
My net takeaway is that it would have been better for this camera to just have one mode that allowed you to set the ISO to a fixed value or Auto and an option to do the same for the shutter speed. Instead you have to fumble between modes if you care, but often times this is a camera where P doesn’t mean a sarcastic “pro mode” – it is actually a valid mode quite often. It’s also in bad need of a much faster maximum shutter speed – like 1/8000! However, Lytro has tried to address this by including a 4 stop ND filter in the box, but it comes in an unlabeled black box that feels empty and is under another bigger box so I didn’t find it until my friend Stephen Eastwood told me about it.
Body design 1.0 is painfully obvious
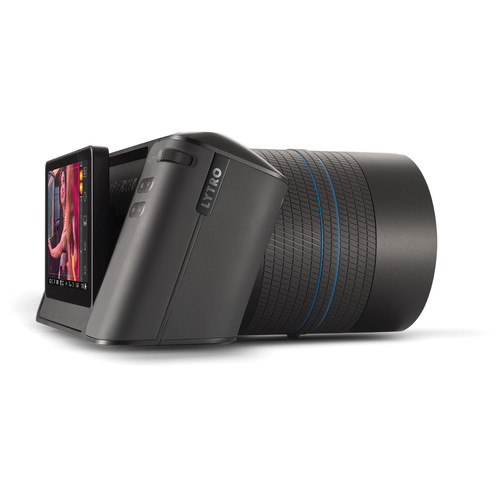
Lytro Illum Side view with LCD extended
It is very obvious that the designers were given the max budget to make a piece of hardware that looked cool, but sadly that means no budget must have been left for usability testing. The net result leads to some frustration at first and later in the field. Some of my big complaints while using this camera were:
- LCD difficult to see in bright light – Since there is no EVF you’ll need a Hoodman Loupe if you plan to use this camera outdoors as the screen is difficult to see in bright light. As a result you find yourself thinking you’ve got the shot when doing a playback but you get it on your computer and realize it’s a total focus fail.
- No LCD screen zoom – With a rear touchscreen that gives you a Live View experience, you’d think you’d be able to pinch to zoom the capture and playback images. Sadly this isn’t the case – for either! In fact, there’s not even a button or knob that I could find that allowed me to zoom in to see if I got the shot. As a result, there were lots of frustrating surprises when I got back to Seattle from California.
- Bad Hood Design – With a cheap plastic pin that is sure to break off eventually and a hole that is easy to miss, I found myself cursing the hood on every shooting. While it is possible to get it to lock, it’s easy to miss the hole and end up with images later where the hood has rotated. I eventually got the hang of it, but was a very cheapo feeling design.
- LCD Menu scrolling isn’t obvious – Until you figure out how the scrolling of the menu works, it feels like you’ve lost half your buttons and you don’t know why. The lack of a visual indicator made it very frustrating and difficult to understand at first. I eventually “got it” but never liked it.
- Information bar randomly disappears – Sometimes for reasons I haven’t yet discovered, the information bar at the bottom would just randomly disappear. I eventually discovered I could swipe it back up to make it reappear, but I definitely felt like I was using the Windows 8 Metro Design Language. Whether your love or curse that UI design, you’ll find the same love/hate with the Lytro touch screen UI design.
I wasn’t a big fan of the hard to open side door and bottom battery loading design, but they worked and I got used to them. Overall I liked the camera body as it was kind a fun and different, but its design does feel a lot like the Windows Phone of cameras.
Click here to see a complete layout of the camera and all of its buttons.
Lytro Desktop Software
I had a lot of challenges with the Lytro Desktop Software, but after a significant amount of time with the excellent support staff I got things sorted. The biggest issue was a bad video driver that wasn’t getting updated when I ran the update software (my issue) and problems related to having my Lytro library on a network drive (ONLY use local hard drives).
It was clear that Lytro primarily focuses on the Mac version, so Windows users beware. However, I didn’t hit any major problems that were unique to the Windows version, so don’t sweat it if you don’t have a Mac.
My biggest lesson learned is that when you are importing images you shouldn’t watch the computer. The download experience – even with 16GB 95/mbps SD cards took an unusually long time to download and process (about 30 seconds per photo) on a i7 system with 16GB RAM and SSD hard drives. As a result, I learned to click Import before going to bed or when I’d be away from the computer for a while as it’s VERY bad if you lose your connection during the download process. Sadly I forgot to turn off Windows Update, so I got burned by that and ended up with a lot of stuff I needed to delete from my library.
Performance and quirky bugs aside, the reality that you can’t do all the things you are used to doing in Photoshop with your images makes it tough to get high quality results. You basically have the abilities of a RAW editor like Adobe Camera Raw but without the cool features Lightroom offers for masking (adjustment brush, spot/heal, etc…). Keep this in mind as it means you have to get things right in camera.
You don’t have to own the camera to see how this software works, so click here to get the software for FREE and click here to get some sample images to play with.
To make the most of your test drive of the software, please be sure to READ THIS.
My Test Shots
When viewing these photos it is best to go full screen, click your mouse around the image to play with refocusing. To see the 3D effect you need to HOLD YOUR MOUSE BUTTON DOWN and then DRAG IN CIRCLES as shown in the video earlier. You can also do the same thing if you go visit the galleries here and here directly. Images in the later gallery that don’t have a 3D effect are my failure as a light field camera operator, so if you don’t see a clear foreground and background object then don’t bother clicking it as it is mostly a static photo.
NOTE: The advanced viewer works better but the resolution of the standard viewer is better.
NOTE: These will crash your iOS devices so view them on a computer, or get the mobile apps here.
Flowers in the field shots are a great way to get started learning how to use this camera
In my attempt to show the bokeh of this camera, I stumbled upon a solid 3D effect. Perhaps this is why Lytro support encouraged me to take my first photos on the carpet of a nearby subject.
The frustrating design of the hood becomes obvious in this shot where a 3D wiggle result in seeing more hood. There’s no fixing this outside of cropping.
Because it is hard to see the screen in the bright outdoors and because you can't zoom, sometimes you think you are fine and end up with a shot that is blurry because critical parts are outside the refocusable range. In traditional photography this is like getting bitten by a minimum focus distance issue when manually focusing.
Ugly photo, but a good example of having depth that creates a living photo.
I thought I had a great shot in camera, but depth map errors (which can be fixed in complex post-processing) are one of the big reasons why I say this is a camera for advanced photographers. The net result is floating flowers!
Having all the light field data in orange is bad, but the more important part is that you have data in the refocusable range. The fact that I have that makes this photo work as a living image
This is a tough camera with kids because you already have a lot to do to get the shot, paying attention to the depth histogram data just makes it even harder
I was lucky enough to find an unexpected hot air balloon, but it was both ugly and hard to find a foreground subject so I would have been better off shooting my photos of it with a different camera. Sadly this was the only camera I had!
Conclusion
The bottom line is that this is a bleeding edge product for advanced photographers who are also geeks. The camera and software both lack the fit and finish you are accustomed to with traditional cameras that have had years to mature. It is a fun product that offers an exciting challenge that some might adds to the creative process, but simple point and shoot or spray and pray photographers will be extremely frustrated by the complexity of this product.
To be clear, you WILL NOT be successful with this product if you don’t take the time to watch these videos. If you haven’t been successful with a light field camera before, it won’t happen without education so be sure to check these out.
At the end of the day I think this is a fun camera to play with, but I have no need for doing 3D / Living Photo work so it isn’t for me. I consider this to be a good choice for a hobbyist with discretionary income, but be sure to bring your regular camera out with you when you shoot as this is NOT a replacement for your normal 2D work. In fact, I wish I would have taken redundant pictures of everything I took with this camera in California as the exported photos from the Illum were unacceptable. Those photo opportunities are now lost so I learned a hard lesson about this product.
If you’ve tried the original Lytro 8GB and were disappointed, don’t let that experience taint you. This camera is NOTHING like that abomination. This is a proper camera that captures light fields and I think it is going to be awesome one day, but for now it is a product for early adopters and people with the extra cash to spare to enjoy being on the bleeding edge.
Where to order
Click here to learn more or order it on the B&H web site.
Rent from LensRentals.com
Click here to rent one from LensRentals.com and use my blog discount to save on this or other rentals.
Guest Opinion from Stephen Eastwood
Many of you may know Stephen from his work as a Canon Explorer of Light, but he’s always been a state of the art photographer so he’s been using the Lytro Illum for a while. I asked him if he wouldn’t mind including some of his own thoughts about the Illum so you could get another opinion:
I got one with no instructions, and no idea what to do with it, not that I am one to read instructions anyway, but here I had one.
The first day out I played with buttons and dials, and learned to use the Lytro button, but could not for the life of me figure out how to focus the image. I had just tapped on the screen and luckily it responded. Who knew it was touch activated?!!
Since then Lytro has added the more logical features such as allowing the focus ring to also rack focus in playback, which is much appreciated to anyone with fingers too big to touch tiny areas on screen. They have also updated many features making this camera a wonderful tool. With that said, even with all the little improvements, it still has a learning curve.
I still think this is a camera that you can learn from in an hour depending on your previous level of tech knowledge, but what takes some time is learning to think and compose differently. I have been shooting stills for over 15 years professionally, and shooting video off and on for about 10 years. It’s not like either, and yet has aspects of both which need to be considered.
First you need to compose and plan for depth in an image. It sounds simple, but I’ve spent 15 years limiting my depth of field in shots through the use of aperture, focal length and composition. Now I need to show depth to get the most from this new technology. I need to think differently and plan for layers to that depth, but I also need to think in terms of a storyline. I want to use the camera to tell a story, using the animate feature I can make a short animation, moving and revealing, rack focusing ones attention here or there, and let a scene unfold as if I were directing a short scene. That all needs to be planned for while you are in the composition mode of shooting, you want to know what your animation is going to say and shoot a shot that allows just that.
So what have I learned? Well certain aspects of the final product work best when you take advantage of what it can do, the perspective shift that gives you the 3D image and sense of motion is best scene and experienced when you have a near object and a far object. The closer the near object is the more effective this is. This means that shooting a landscape with nothing in the foreground won’t be nearly as impressive as shooting that same shot with something up close and with something that you can rack focus from and get a feeling or sense of looking around to see what is behind it. That is the exact effect that makes the 3D images pop off a screen and creates an immersive visual. Also, I learned that having several layers of depth, several points of interest at varying distances gives the viewer more of a story, more of a reveal. If you are allowing people to be interactive rather than just watch a pre-established animation it will be much more interesting.
I do have a tip that I think everyone should know before they begin to shoot with the Illum. The logic of how cameras and optics usually work dictates that if you have something in the foreground and something way in the background in the refocusable area of the Lytro image, so everything in between should be as well. Well that's not the case, and it’s clearly visible on camera that there is a small spot in the center of the depth histogram that is neither blue (near refocusable objects) nor in the reds (far refocusable objects) - it is a gray bar dead center of that range. It’s an area that is not fully refocusable, and you need to be aware of this and not put a direct point of focus or object of interest in that area. Fortunately the Lytro button will show a great representational histogram of this and you can simply adjust to limit what is in that “dead zone” and move it fore or aft. Armed with this info and an imagination you should be on your way to creating living pictures!
So what’s so good about living pictures? Why do you want them?
I'll be the first to tell you this is not a replacement for your current camera system – it’s an additional tool that allows you to create unique products in a way never before possible. It can differentiate you and what you offer from the competition and help you to stand out to clients and add some new service and product they were not aware was an option.
This is not a high MP camera that produces the now typical 20+ mp file for print, rather I see it as a capable camera that offers a new product. In this day of digital most of what I shoot never gets printed, I do commercial shoots where 120 shots are taken, 2 are ever printed in ads - the rest are strictly digital content for the web. With the Illum, I shoot something for the web or digital billboards that stands out from a still.
I can now shoot an image that has perspective, has movement, holds interest of the viewer as things refocus, or as you take a quasi-look-a-round it makes a unique product that is perfect for getting viewers to linger on a webpage longer, stare at a digital billboard for a few seconds rather than just glance and pass by. It creates a unique product that allows you to create something that catches the attention of viewers, and it does so with the ease of a still camera yet produces as effect that can appear to have been taken with video and a slider move.
I warn you, this is not a simple point and shoot process. It is one that takes vision, and one that produces much more than a P&S experience when done right. However, I feel it is worth the reward.
As for the company that makes it, Lytro may be one of the most responsive to changes and improvements I have ever known. I say that coming from years of experience with cameras that could be improved in this or that area easily, but rather than offer a firmware update, it becomes a feature of the next model to entice you to upgrade. Lytro seems to listen and is working to improve the camera user experience by adding updates and features as they become possible. Their attitude is something so uncommon it seems to go against the very nature of corporate policy. It not only applies to the camera, but the software too. They are adding new features and capabilities often, so when you have an issue the tech support team actually takes the time to help you figure it out and get the most from your images.
I encourage you to try one out! If you learn to think a little differently, the results you see when viewing your images through 3D glasses will get your creative energy going. By your second shoot you will already be thinking of what you could have done to maximize the potential of this piece of gear. You will quickly start creating situations and settings to fully take advantage of the whole process for some amazing living images!
Thanks Stephen!
Other articles you may enjoy
If you enjoyed this article, you may also enjoy these:
- Canon 7D Mark II
- Fujifilm X-T1 (includes 18-55mm & 23mm lens reviews)
- Nikon D750 - Yeah, you want this one!
- Nikon D810 (includes SIGMA 50mm Art & Otus 55mm)
- Sony a6000 (includes 16-70mm lens)
- Sony a7R
- Canon 100-400m f/4.5-5.6L IS II USM (NEW)
- Canon 200-400mm f/4L IS with 1.4X Extender
- SIGMA 35mm Art Series
- SIGMA 50mm f/1.4 Art Series (includes comparisons)
- Zeiss Otus 55m f/1.4
- Zeiss Otus 85mm f/1.4
Disclosure
If you make a purchase using links found in this article, I may make a commission. It doesn’t cost you a penny more, but it does help to support future articles like this.


