Tuesday, April 30, 2013

TUTORIAL: Nik Software Color Efex Reflector Effect Video–NOW WITH Audio

Back in July of 2009 I did an article called “The Digital Reflector – the solution to dark faces on bright backgrounds” that proved to have one of my most popular YouTube videos over the years. This really surprised me because the video didn’t have any audio due to a glitch on my system.

I finally have some software that allows me to voice annotate videos, so I’ve added a new audio track and re-uploaded this popular video. While I won’t surpass Gangnam Style in the number of views, I do hope that you enjoy it!

Please keep in mind that although this video was done with both an older version of Lightroom and Color Efex, it still applies to the current versions of Lightroom, Photoshop, Aperture and Color Efex.

To see the text that goes with this article, please click here.

Where to order

The products that dominate my favorite plug-ins are the Nik Collection by Google which consists of the following 6 products all for only $149 USD (worldwide). Click the banner below or CLICK HERE to get it for only $126.65 with my RONMART coupon code:

Click the banner or here to learn more about the special offer for owners of any Nik Software product:

Owners of Nik Plug-Ins Get 50% Off Perfect Photo Suite 7


Other articles you may enjoy

If you enjoyed this article, you may also enjoy these:

Disclosure

If you make a purchase using links found in this article, I may make a commission. It doesn’t cost you a penny more, but it does help to support future articles like this.

NOTE: This site requires cookies and uses affiliate linking to sites that use cookies.

If you enjoyed this article, please support future articles like this by making a donation or saving money by using my discount coupon codes. Either way, your support is greatly appreciated!

This blog is intended for freelance writing and sharing of opinions and is not a representative of any of the companies whose links are provided on this site.

The opinions provided are of Ron Martinsen alone and do not reflect the view of any other entity

TUTORIAL: Using Nik Software Color Efex Pro 4 & Special Offer

Click here to read my full review!

Copyright Ron Martinsen - ALL RIGHTS RESERVED
Color Efex Pro 4 – The right panel is where things get very interesting
Click for a closer look

Videos

Here are three videos that I did when I was first reviewing Color Efex 4 just before it was released to the public. It shows you what you can do with Color Efex 4:


Play in HD


Play in HD


Play in HD

Hopefully you enjoyed seeing what is possible with the Nik Collection by Google.

Before and After Images

Here’s a few images featured in the videos where you can see the before image and mouse out to see the after image.

ALL images are Copyright Ron Martinsen – ALL RIGHTS RESERVED. Please do not copy, link, save, print or redistribute in any way without my expressed written permission and a signed agreement.


Black & White Model Before


Black & White Model After


Seattle Sunset Before


Seattle Sunset After


Outdoor Model Before


Outdoor Model After

See the videos for more details about the filters used. Keep in mind these are subjective results which you can adjust to suit your taste. Given more time I would probably do some things differently. The important takeaway are the powerful tools you have at your disposal in the Nik Collection by Google.

Coupon Code – 15% OFF

Click here to get the ENTIRE
Nik Complete Collection by Google now only $126.65

Disclosure

I may get a commission if you make a purchase using links in this offer and/or my coupon code.

NOTE: This site requires cookies and uses affiliate linking to sites that use cookies.

If you enjoyed this article, please support future articles like this by making a donation or saving money by using my discount coupon codes. Either way, your support is greatly appreciated!

This blog is intended for freelance writing and sharing of opinions and is not a representative of any of the companies whose links are provided on this site.

The opinions provided are of Ron Martinsen alone and do not reflect the view of any other entity

Monday, April 29, 2013

Great T-Shirt for Photographers–Camera Sutra

Camera Sutra T-Shirt

I thought this Camera Sutra T-Shirt was pretty funny, so I thought I’d share it with other Photographers who have a good sense of humor. I can’t stop laughing at “The Grape Crusher” and “The Underexposed” – too funny!

Enjoy!

Where to order

Click here to order one today on my friend Trey Ratcliff’s Stuck In Customs web site where you can find this and several interesting tutorials, eBooks, presets and much more.

Other articles you may enjoy

If you enjoyed this article, you may also enjoy these:

Disclosure

If you make a purchase using links found in this article, I may make a commission. It doesn’t cost you a penny more, but it does help to support future articles like this.

NOTE: This site requires cookies and uses affiliate linking to sites that use cookies.

If you enjoyed this article, please support future articles like this by making a donation or saving money by using my discount coupon codes. Either way, your support is greatly appreciated!

This blog is intended for freelance writing and sharing of opinions and is not a representative of any of the companies whose links are provided on this site.

The opinions provided are of Ron Martinsen alone and do not reflect the view of any other entity

Post-Mortem: RonmartBlog.com Reader Appreciation Workshop on April 27, 2013 hosted by BlackRapid

My friends at BlackRapid are helped me out by hosting my first ever reader appreciation workshop in Seattle on Saturday April 27, 2013. Everyone seemed to have a great time and the most repeated phrase I heard was “this was better than most workshops that I’ve been to in the past”!

CALL TO ACTION IF YOU ATTENDED THIS WORKSHOP

If you attended this workshop please add your comments to this article to share what you thought about the workshop. If you took any photos then please share your link to your gallery of shots when you get a chance.

Our Beautiful Featured Models

All the attendees were raving about how much fun they had working with two of my favorite models Raia & Juliet. They gave a 110% with almost no break during the entire 5 hours they were there!

They both volunteered to give up a Saturday and work at a drastically to help make this event happen at the lowest cost possible, so a huge thanks goes out to these real pros. They made me look good as well as all of the photographers who worked with them!

Raia
Raia

Juliet
Juliet

I gave away thousands of dollars worth of Free Stuff!!!!


Think Tank Photo Pixel Pocket Rocket™ was given to ALL participants
A $18.75 value!

lens rental
2 Lucky Winners won a $100 Gift Certificate for a future rental


All participants won a FREE upgrade to the Premium Edition (a $99.95 value)

Nik Collection by Google - only $149
1 Lucky Winner won a FREE copy of the Nik Collection by Google (a $149 value)
Click here to learn more


1 Lucky Winner won get a FREE copy of the Topaz Photoshop Bundle (a $299.99 value!), and another won a copy of Adjust

BR_big-R_logoscript_on-Black-S

Yeti_Front-X2

BlackRapid let everyone try out their cool straps while they were at the workshop. They also gave away the Yeti (a $99 value - shown above), some lens bling and a sport strap to three lucky winners.

THANK YOU

Thank you to all the readers who attended, and a HUGE thank you to Ron Henry & BlackRapid for hosting his event Susie Nisco for pulling everything together to make it all run smoothly. Heck, Susie even pinched hit as a third model which was above and beyond the call of duty – BlackRapid is so lucky to have her on their team!

I’d also like to thank onOne Software, ThinkTankPhoto, Borrowlenses.com, Google, Topaz Labs, and BlackRapid for their generous gift support as well! I’d also like to thank Glazers Cameras  who gave us a discount on the rentals to help lower costs.

While this workshop cost me several hundred dollars and a day away from my family, I was thrilled to get a chance to interact with my readers. I wish I could have supported even more people, but the hands on approach of this workshop was very important to me. I hope everyone who attended enjoyed it. If you did, please show your support by sharing links to your favorite articles on your favorite websites, forums, social media, digg, etc…; donating; or coming back here to use my links or discount coupon codes when you order your photography gear or photo editing products. If you have any questions or need a link, just contact me and I’ll be happy to help! – Ron

Other articles you may enjoy

If you enjoyed this article, you may also enjoy these:

Disclosure

If you make a purchase using links found in this article, I may make a commission. It doesn’t cost you a penny more, but it does help to support future articles like this. Ron is also a featured photographer on BlackRapid.

Free gifts are based on email commitments from sponsors, but fulfillment is a the sole discretion of the sponsor. Winner is responsible for taxes and void where prohibited.Offers subject to change without notice.

Lucky Winners were announced during the event. Fulfillment will be via email, so the registrant is responsible for providing a valid email. An invalid email bounce will disqualify eligibility.

NOTE: This site requires cookies and uses affiliate linking to sites that use cookies.

If you enjoyed this article, please support future articles like this by making a donation or saving money by using my discount coupon codes. Either way, your support is greatly appreciated!

This blog is intended for freelance writing and sharing of opinions and is not a representative of any of the companies whose links are provided on this site.

The opinions provided are of Ron Martinsen alone and do not reflect the view of any other entity

QImage 2013 – Complex Print Layout Made Easy

QImage 2013 - Makes Print Layout Easy
This user-interface might seem intimidating, but it’s really a breeze to use

When I reviewed QImage back in 2010, I quickly fell in love with how simple it was to do complex print layouts. You know, stuff like maximizing prints you can fit on the paper in exactly the size you want? Sounds simple right? Well, if you’ve tried doing this in Lightroom or just about anything else, you know that you can pull your hair out trying to get exactly what you want while still making the best use of the paper.

Deep Focus Sharpening – WOW

I won’t rehash a lot of what I covered in my old review, so I strongly encourage you to check it out here. There’s tons that this product can do which I covered in that article, but for this one I want to focus on one big new feature for 2013 – Deep Focus Sharpening.

For those who aren’t familiar with QImage, it has the ability to edit your raw or jpeg images much like Lightroom 4’s develop tab. Here’s a snapshot of the UI doing some pretty aggressive USM sharpening:

SNAGHTML594426b7

As you can see above and below, the USM sharpening has some pretty nasty halos:

SNAGHTML594690af
Notice the strong halos around the text and the dark shadows on the dial

SNAGHTML59479ffb
With Deep Focus Sharpening you just get the sharpening
without the strong halos

Having trouble seeing it? Here’s another example on the same image:

SNAGHTML5949bb38
USM with nasty halos

SNAGHTML5949ddc5
DFS with no halos

SNAGHTML594ade61
No sharpening

What this means is that you can add some extra sharpening to your prints without destroying the quality of the image itself. What’s more, QImage will adjust your print sharpening based on the size of your image so you don’t have to give yourself headaches trying to create a special PSD or JPEG of your file for all of your desired print sizes.

This is printing made simple with a revolutionary sharpening method that I honestly wish was in Photoshop and Lightroom!

Video Demo

Some things you just need to see in action to really appreciate it, so here’s a quick video so you can see why I think QImage is so cool.

Conclusion

While I still wish QImage would get a major refresh of its user-interface, it has legions of happy users who like it just the way it is. I know that the most important part – the print layout and use of Deep Focus Sharpening – are pretty easy to use, so I guess that’s all that matters. It’s price can’t be beat and the Deep Focus Sharpening could be worth the price of admission for those looking for better sharpening without image destroying halos that are sure to show up in your prints.

Don’t believe me? Check out the free 14 day trial, and really click on every menu options and test every feature you can – you’ll be very surprised by what they’ve managed to stuff in this app!

Special Offer

SNAGHTML59562263

I’m almost embarrassed to provide a special offer because this app is so inexpensive! With that said, I’m pleased to announce that you can save over 10% when you use this link which is EXCLUSIVE to ronmartblog.com readers! You aren’t going to find a deal like this anywhere else on the web, and it may be for a limited time so if you are interested act while this offer is in effect!

Other articles you may enjoy

If you enjoyed this article, you may also enjoy these:

Disclosure

I was given a free copy of Qimage Ultimate for the purpose of reviewing this product and I may get a commission if you make select purchases through this article. Thanks for supporting the blog by purchasing using the links provided!

NOTE: This site requires cookies and uses affiliate linking to sites that use cookies.

If you enjoyed this article, please support future articles like this by making a donation or saving money by using my discount coupon codes. Either way, your support is greatly appreciated!

This blog is intended for freelance writing and sharing of opinions and is not a representative of any of the companies whose links are provided on this site.

The opinions provided are of Ron Martinsen alone and do not reflect the view of any other entity

Friday, April 26, 2013

Get Lighting Tips from Pulitzer Prize Winning Photographer for FREE

My good friend and Pulitzer Prize winning photojournalist, Gary Parker, has a cool new blog that I love and I think you will too! 

In the spirit of a picture is worth a thousand words, here’s an authorized screen grab so you can see at a glance what his articles look like:

Swamp Dog Speaks - Gary Parker Photography Blog
Image Intentionally Blurred

This is a well respected pro and 2x photographer of the year sharing his lighting tricks with diagrams. Gary Parker is basically the Joe McNally of the Canon world, so its fun to see how he pulls off some of these shots he does. This particular one was done in film 9 years ago with some technology that sure looks a lot like the Google Glasses of today!

Gary has photographed the who’s who of high tech from Steve Jobs to Bill Gates and everyone in between, yet he’s not a one trick pony. He’s also done some of the most amazing pet photography and national ad campaigns that will make you do a double-take and say – hey, I just saw that at the store today! 

The fact that he’s sharing his knowledge on a free platform like this blog is friggin awesome, so go check it out – you might learn a thing or two and it won’t cost you a penny!

Here’s Gary’s sites which I’m sure you’ll enjoy:

Here’s a few guest blogs he has done for me too:

Enjoy, but please come back to visit me sometime too – ;-)

Ron

NOTE: This site requires cookies and uses affiliate linking to sites that use cookies.

If you enjoyed this article, please support future articles like this by making a donation or saving money by using my discount coupon codes. Either way, your support is greatly appreciated!

This blog is intended for freelance writing and sharing of opinions and is not a representative of any of the companies whose links are provided on this site.

The opinions provided are of Ron Martinsen alone and do not reflect the view of any other entity

Thursday, April 25, 2013

Nik Software Owners: Get onOne Perfect Photo Suite 7 for 50% off


This offer has moved - CLICK HERE to see the latest offer

For a limited time only, owners of Nik plug-ins including the Complete Collection, ColorEfex Pro, Silver Efex Pro, Viveza, or Dfine, can get 50% off onOne Software's Perfect Photo Suite 7 Premium Edition!
Perfect Photo Suite 7 Premium Edition includes seven integrated products that give you more capabilities and more power and than any plug-in collection available. It seamlessly integrates with Photoshop, Lightroom, and Aperture, and unlike other plug-ins, you can also use it as a standalone application with full photo editing capabilities including layers.
When you become an onOne Software owner, you'll have peace of mind knowing that your software 
investment will continue to reap rewards from our ongoing development of new and ground-breaking technologies today and into the distant future.

Ordering Info

image
Your cart should look like this if you clicked the correct link 
Just click here and order the upgrade of Perfect Photo Suite 7 – no other discounts can be applied (including my coupon code). You can get my thoughts on this great suite at http://www.ronmartblog.com/2012/11/coupon-codereview-onone-perfect-photo.html. This is a great deal that I definitely recommend!

Don’t have a Nik Software Product? Get it here at a discount!

Click here to learn more about how you can get a special deal on the Nik Collection by Google and get both suites for the less than the full price for Perfect Photo Suite!

Disclosure

If you make a purchase using links found in this article, I may make a commission.

NOTE: This site requires cookies and uses affiliate linking to sites that use cookies.

If you enjoyed this article, please support future articles like this by making a donation or saving money by using my discount coupon codes. Either way, your support is greatly appreciated!

This blog is intended for freelance writing and sharing of opinions and is not a representative of any of the companies whose links are provided on this site.

The opinions provided are of Ron Martinsen alone and do not reflect the view of any other entity

COMPARISON: Fujifilm X20 vs X10 – Have I found my 2013 P&S of the Year? (Updated: April 25th, 2013)

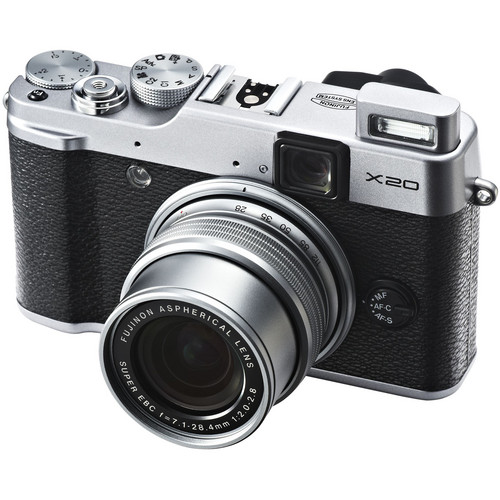
Fujifilm X20
Fujifilm X20 (also available in black)

The Fujiflim x10 was my 2011 point and shoot camera of the year for a good reason. It blew away the competition at the time.  What’s more, its EXR technology pulled off shots that even my best pro DSLR’s today couldn’t do without HDR. This coupled with its cool rangefinder appearance and premium camera construction made buy one for myself. Once it ended up in our household my wife quickly retired our trusty Canon G12 and never looked back. Many cameras have come and gone since that day, but the one she always goes back to is the x10. I felt the same way which is why on our trip to Hawaii I reached for the x10 more than any other camera I had with me (including my cell phone) – despite having easy access to all my pro gear during the entire trip. The x10 was a camera built for people who wanted to think about photography and not cameras, and who insisted on great quality results.
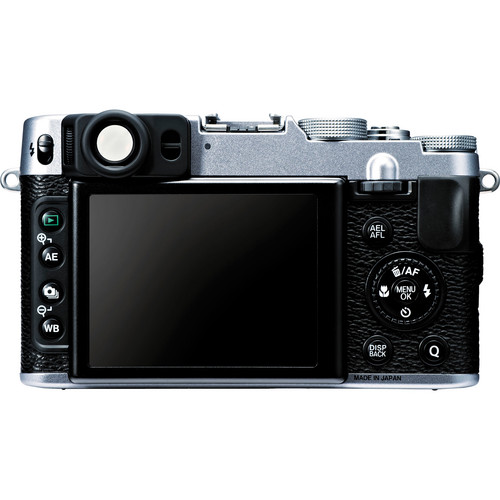
Fujifilm X20 Rear View

Fast forward to 2013 and I was crushed to find that the EXR mode that my wife loved so much had been removed from the replacement to our beloved x10 – the x20. I immediately worried that Fujifilm might have tried to improve the x10 so much that they made it like the x100 or X-Pro1 where image quality came at the expense of usability. Their horrible AF systems didn’t exist in my x10, so my bar was super high for the x20.
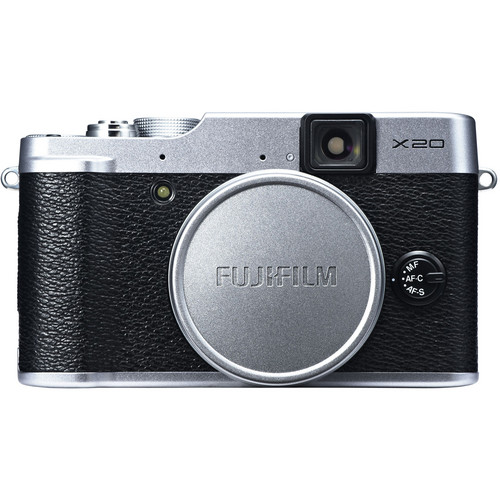
Fujifilm X20 - Front with lens cap view

After using the x20 for nearly a month I can say that I’m both very happy and very disappointed in it. I will say up front that it’s too early to declare it my point and shoot camera of the year as it has some flaws that are tough to forgive in today’s market (which is much tougher than in 2011). However, it’s improvements have been significant enough that I personally bought one myself. As a result I’ll start with a high level review here and add some additional content down the road after I’ve had more time living with this camera day in and day out.

What I can say up front is that the x20 is still an outstanding camera that is sure to please anyone that uses it as a device to take photos. I think the video performance with this firmware is abysmal and there seems to be a loss of the video stabilization that seemed to exist in my x10. I’ve got another x20 on the way (the one I purchased for myself) so I’ll do some additional testing, but thus far video feels like a place where this camera has taken a big step backwards.

Comparison: X10 vs X20 – External Design

X10 Left - X20 Right - Front View

My favorite point and shoot camera is shown on the left next to my review unit x20. Despite spending a rough couple years in my wife’s purse (with lots of sharp objects – some of which did leave their mark), it’s held up well. With this in mind I was so happy to see that Fujifilm didn’t really change much of the ergonomics of the body. Beyond some minor cosmetic changes they are identical. When held in my hands they feel the same weight, size and pretty much like the same camera.

X10 Left - X20 Right - Top View

Up top my x10 is shown in the “spouse mode” – EXR mode. This was the mode that I told her (and the many people I encouraged to get x10’s) to keep the camera in most of the time. While EXR mode didn’t offer RAW files, I didn’t care because this wasn’t my pro camera – it was our family camera for snapshots and memories that didn’t need DSLR features (otherwise I would have used my DSLR). ‘

The only major change up to for the x20 is the replacement of the EXR mode with a scene recognition mode (SR+) . Fundamentally they are interchangeable, but functionally they are different. In fact, if there’s one thing I’m really disappointed about is that the EXR mode seemed to pull off more amazingly balanced exposures in the most difficult conditions than the X20’s SR+ mode can. The SR+ mode is very good – and some ways better than the X10’s EXR mode, but it did take some getting used to.

X10 Left - X20 Right - Rear View

On the rear panel the big news is that the RAW button is now called the Q button which isn’t a big deal since the latest X10 firmware replaces the RAW button with an almost exact Q button menu as the X20. There’s also a swap between the AF Point and AF drive buttons with the latter moving to the dial so that burst mode is more obvious from its new button location.

The only other major external change is the addition of the sensor that detects when your head (or hand) is close to the viewfinder. For most, disabling that sensor will be the first thing they do after getting their camera because it’s so annoying.

X20 Real World Sample Images

As always, these images ALL RIGHTS RESERVED (yes, even the lame ones <g>). You may not save, edit, print, redistribute or otherwise use them without expressed written permission.

The full set of images is available at http://www.ronmartinsen.com/fujifilm/x20, but here’s a few noteworthy images. Click the image for the original and view using the gallery to see EXIF information. All major settings were camera defaults and in most cases I’m using the new SR+ scene recognition mode that replaces the old EXR mode that I loved.

I’ll be adding more images while I do my long term testing.


One of the first shots I took from the x20 that made me say WOW, this isn’t the x10!
f/5.6 @ 21.9 mm,1/600, ISO 100


Delicious in-camera color, check!
Wide
dynamic range? You bet!
f/5.6 @ 8.6 mm,1/340, ISO 100


Shot by my wife from a SUV doing 60 mph (window closed)
f/3.6 @ 28.4 mm,1/300, ISO 100


x20 in Super Macro mode rocks for flowers!
f/3.2 @ 7.1 mm,1/250, ISO 200


Panos still impress
f/3.2 @ 7.1 mm,1/250, ISO 100


I’m always impressed with how well it handles moving people
f/6.4 @ 7.1 mm,1/450, ISO 100


Great color and detail are obvious in all low ISO shots
f/6.4 @ 7.6 mm,1/640, ISO 100


The x20 isn’t a miracle worker though – it couldn’t help these ugly Easter bunnies
f/2.2 @ 7.9 mm, 1/30,ISO 100, No Flash


Blistering fast AF even in non-ideal light!
High ISO performance still sucks though
f/2 @ 7.1 mm, 1/340,ISO 1600, No Flash


f/2.2 @ 10.8 mm,1/60, ISO 2500, No Flash (taken by my wife)


f/2.2 @ 7.9 mm, 1/30,ISO 1600, No Flash (taken by my wife)


f/2.2 @ 7.9 mm, 1/60,ISO 1000, No Flash (taken by my wife)

My old X10 gallery can be found here where you can see some sample images form the older camera at various ISO’s for offline comparison.

UPDATE: April 24, 2013 – Here’s another article with even more images:

Living with the Fujifilm X20 (and letting your spouse use it) vs Fujifilm X10

As always, these images ALL RIGHTS RESERVED (yes, even the lame ones <g>). You may not save, edit, print, redistribute or otherwise use them without expressed written permission.

Bookshelf Test (Updated April 25, 2013)

My top level findings are that there are no obvious resolution advantages of the X20 over the X10, despite the removal of the low pass filter in the x20. I expected a big advantage for the X20, but I didn’t observe that in my testing. The metering is more accurate in the x20 which creates better contrast and accurate color, whereas the X10 overexposes by a stop more.

The in-camera noise reduction of the x20 is so bad that it should be set to –2. Since this can’t be done in Scene Recognition mode (SR+), you end up with details being smeared in that mode versus crisp sharp images with the x10. 


X20, f/2 @ 7.1 mm, 0.7s,ISO 100, No Flash


X10, f/2 @ 7.1mm, 1.5s, ISO 100, No Flash
The X10 in Aperture Priority chose a longer exposure for identical conditions

While there are plenty more shots at http://www.ronmartinsen.com/fujifilm/x20 (and x10 Bookshelf files are here), the big takeaway right now is that the bookshelf test results are very good for low ISO’s with in-camera JPEG’s. The RAW (RAF format) files are very soft out of the camera and rely on post-processing, but they clean up real well (much like a kit lens for lower end DSLR’s). As you’ll see with the samples the images get so ugly after ISO 3200 that few would be able to use them. ISO 12,800 is a joke – it’s the worst I’ve ever seen so consider this an ISO 3200 (6400 in a pinch) camera.

Sharpness-wise the x10 and x20 seem to be about the same to my eyes, but the X20 in-camera noise reduction sucks. As you can see in the image below it smears the detail as ISO’s increase. The x10 has a tendency to over expose by about a stop over the x20 which may make some x10 users feel like he x20 images are darker. This can be compensated for by using the exposure dial on the camera, but honestly I think the x20 has more accurate metering.

SR+ vs EXR Mode – Not even close to the same

image
The X20 SR+ mode on top vs X10 EXR mode on bottom

The more accurate metering accounts for the faster shutter speeds and darker x20 image because the X10 has a tendency to overexpose. When side by side it will feel like the X20 is underexposing because the X10 image is so bright, but when you let your eyes adjust the X20 looks more accurately metered to my eyes (or perhaps –1/3ev).

The brighter images of the X10 give the perception that it does a better job because we often like brighter images. To compensate for these problems I did exposure matching below where I still think EXR has something special with the perceptual dynamic range. I couldn’t reproduce that mojo with the X20, so I’ll probably still keep my X10 as an extra camera for when I need this extra range.

X10 EXR Exposure vs X20 Aperture Priority matched

imageX10 EXR mode vs X20 Aperture Priority Exposure Matched (DR400)
Click to see full size of 1x crops
Cameras are reporting same focal lengths but they are visually
off with the same lens so I think it’s a bug in one of them

What I see here is that EXR mode definitely using more sharpening, and as I’ve suspected it seems to have a broader dynamic range. The colors on the X20 just feel a bit more bleached out. The less aggressive noise reduction also preserves more detail.

X10 Aperture Priority matched to X20 SR+ Exposure

YOU MUST click to view original
X10 Aperture Priority Exposure Matched (DR400) setting vs X20 SR+
Click to see full size of 1x crops
Cameras are reporting different focal lengths but they visually
match with the same lens so I think it’s a bug in one of them

I should note here that both cameras were using the latest firmware at the time this test was done. The X10 is on 2.0 and the X20 was on 1.01. You have to click the image above to get the full size version. What you’ll see is that there’s a tad more noise in the X10 which makes sense because x20 SR+ noise reduction sucks. The noise reduction of the x20 causes some detail smearing but the details that are left feel a tiny bit sharper. The X10 has better all detail preservation which is simply due to less aggressive noise reduction. Beyond that they seem pretty close.

RAW via Lightroom 4.4

Here’s Lightroom 4.4’s post-process of a RAF file with develop tab defaults:

image
X20, f/2 @ 7.1 mm, 1/42,ISO 3200, No Flash – Zoomed to 100%

Above is a 100% crop above of the full shot shown earlier in this section. I definitely prefer the in-camera JPEG version, but if you must only use RAW files this gives you an idea of your starting point.

About Real World Sample Images

I sometimes am asked, “what do you mean by ‘real world’ sample images?” Some have even taken a poke and said “does that mean photos that suck?”

The truth is that as a consumer one of the things that has always annoyed me is when I see the images from a camera on a web site that look fantastic, but when I get it home and use it under normal everyday conditions the photos just don’t have the same “oomph”. As a blogger  I began to investigate “why” there were these discrepancies and I discovered three things:

  1. Some sites doctor their photos so what you are seeing is an edited image that used the camera in question, but that’s not an image you’ll really ever get out of the camera. To me this is useless.
  2. Some sites only show you photos taken in beautiful surroundings and lighting conditions. While these may be real images, they aren’t the type of image the average person will be taking. This leads to massive disappointment when you get home and are shooting around the house in very difficult lighting and non-ideal locations and think “gosh, this camera sucks compared to what I saw on the web”.

All of the images I feature for all my camera reviews are only impacted by the in-camera processing which is also what you see on your camera’s LCD (even when you shoot RAW). There is NO post-processing and what you see is what you can expect to get. While I do try to get some images in nice settings so you can see what a nice photo will be like, I also work hard to stress the camera to see how it performs under difficult situations (i.e., backlight, mid-day sun highlights, tungsten lighting, indoors with high ISO, etc…).

It’s my opinion that real world shots really tell you what you want to know about a camera and keep you from being surprised when you get it home. It does mean that I have to take some criticism for shots that aren’t always cropped perfectly (what you see is EXACTLY what came out of the camera), and I show image failures. However, my goal is to be the place that you can trust for a REAL assessment of a camera and a place you can trust.

Conclusion

My basic advice is that owners from other platforms who don’t use video much will be very happy with the X20. X10 owners will miss their EXR mode and video performance, but otherwise will love this camera in every way. The AF is improved and it is SOOOOOOOOOO much faster in every way. The 9fps burst mode rocks and the start/stop as well as time waiting between shoots feels like it’s a 100x faster. As a result, I can actually use this camera to photography my active son in a variety of scenarios that the X10 could never handle.

Is the x20 my point and shoot camera of the year? Sadly, no. This is a great camera, but the poor in-camera noise reduction and video hold it back in this super competitive market we live in these days. With tough competitors like the Nikon COOLPIX A, Sony RX100, Olympus XZ-2  and Panasonic DMC-LF1 makes it hard to forgive these faults, but Fujifilm seems to respond to feedback so hopefully firmware updates will resolve these problems.

In then end, the x20 is still the camera that I bought for myself because it is great in the areas that I find most important – especially when I set the in-camera noise reduction to –2. I’m hoping that firmware updates will improve the SR+ mode and noise reduction issues as well. I will admit that I tested the x20 around the same time I tested the phenomenal x100s, so my expectations were super high for the x20. However, it’s half the price but not half the camera so I can still highly recommend it as an excellent compact camera.

Where to order

Click here to order the Fujifilm X20 from B&H web site.

Click here to order from Adorama.

Click here to order from Amazon.

Other articles you may enjoy

If you enjoyed this article, you may also enjoy these:

Disclosure

I was provided with a loaner camera by B&H for this review. If you make a purchase using links found in this article, I may make a commission. It doesn’t cost you a penny more, but it does help to support future articles like this.

NOTE: This site requires cookies and uses affiliate linking to sites that use cookies.

If you enjoyed this article, please support future articles like this by making a donation or saving money by using my discount coupon codes. Either way, your support is greatly appreciated!

This blog is intended for freelance writing and sharing of opinions and is not a representative of any of the companies whose links are provided on this site.

The opinions provided are of Ron Martinsen alone and do not reflect the view of any other entity