Thursday, June 30, 2011

B&H Review: HDSLR Microphones

I’ll make the disclaimer up front here that I’m not a videographer and don’t have much interest in becoming one. However, like many people I do have DSLR’s that can record HD video so there are occasions (like for this blog) where I use that feature. When I do the most common problem I face is very horrible quality sound. There is feedback from the internals of the camera and the volume is so low that it drives people crazy. As a result I thought I’d try a couple products from B&H to see if they really made much difference.

For all of my tests in this article I use a Canon 5D Mark II with the Sound Recording option set to Auto (under Live View settings).

Sennheiser MKE 400 Compact Video Camera Shotgun Microphone

Sennheiser MKE 400 Compact Video Camera Shotgun Microphone

One of the first DSLR microphones I’ve seen in action in real life is the Sennheiser MKE 400 Compact Video Camera Shotgun Microphone. It’s German made and at first has that solid German construction and design that you’d expect. In the photo above you can see its size in relation to the size of a Canon 5D Mark II with a 16-35mm lens. This mic fits nicely on this camera and works much better than the built-in mic. Here’s a super lame video that I did which shows how it works exactly as it is configured in the photo above:


Play in HD

As you can tell in the video there is a bit of a hum that is noticeable. I’ve seen a few references to this issue on the web and opinions vary on how to correct it (see my choice below). While the hum is a little annoying, it’s not annoying to the point that it really bothers me as there are trade offs when you try to reduce the hum. This mic is such a huge improvement over the built-in mic that I can totally live with what I’m hearing in this video.

For this test I used the low-cut filter (looks like a windsock) setting (as shown in the photo above the video) which is supposed to suppress noise caused by crosswinds blowing past the mic. I also chose the vol + (high sensitivity) setting which provides an audio boost for quiet or distant sound sources. While not included on the web, I also tested using the regular setting and the +/- db settings. All worked as described in the manual, but for the outdoor conditions I was in I found the settings I chose were the best option. Some may prefer the vol – (minus) setting as it does mostly eliminate the hum but I felt the audio was more flat than I prefer. In all cases I prefer the low-cut filter on as it doesn’t destroy the sound and it seems to help with hum and normal wind noise.

On the web you get mixed reviews about the build quality of this product. Some praise its solid build quality an German design, whereas others chastise it as being too fragile at the base. My 2 cents on the matter is that it is well designed and fairly solid, but the mount appears to be designed for shock absorption purposes so by its nature it can’t be rock solid (or you’d get feedback through the mic on small impacts when moving around). As a result this isn’t a device you want to just toss in your pocket or leave mounted to your camera when you stuff it into your backpack. Just like many Bluetooth headsets, if you toss them in your pocket they won’t last long and I suspect this is no different. However, with reasonable and sensible care I believe it would be perfectly fine. It would have been nice if Sennheiser had included a protective case. Since they didn’t, I’d probably keep the shipping box around and just keep it in its plastic casing to ensure its safety in my camera bag. I didn’t have any damage with my test unit during normal usage scenarios so it certainly isn’t as fragile as some have claimed on web reviews.

My primary gripe with this device is the lack of clear feedback that the device is on (my unit only flashed a power light for a second). Like many I wish the base mechanism was more confidence inspiring in its build quality, but I can accept the realty that it may be a necessary evil – especially at this price point. My usage was very minimal outdoors, but the consensus I had from people I talked to was that the foam cover is insufficient for real outdoor use. As a result nearly everyone suggests getting the Sennheiser MZW400 Wind-muff and XLR Adapter Kit for the MKE400 as shown above. 

I would recommend this device to a friend and feel that it is decent for basic non-pro applications.

Rode VideoMic Pro Compact Shotgun Microphone

Rode VideoMic Pro Compact Shotgun Microphone

In doing research for this review I found that Rode is a trusted name among prosumer videographers. The Rode VideoMic Pro Compact Shotgun Microphone (the replacement for the original VideoMic which seemed to have major issues) was generally praised as being a good product for this price point. It certainly looks the part so I was interested to see how it performed. As you can see in the photo above its quite a bit larger than the MKE 400, but it is still a reasonably manageable size.

While labeled differently the VideoMic is functionally equivalent to the MKE 400 with the addition of a wider range of db settings. I found the 0db setting to be about the same as the vol + on the MKE 400. The switch to the far right is the High Pass Filter (HPF) setting which is like the low cut filter on the MKE 400.


Play in HD

As you can tell in this video the sound is a bit more muffled than the MKE 400 due to the larger foam windsock and High Pass Filter (HPF) setting I used. I found its performance to still be acceptable, although it seems to be a better choice for wind right out of the box without any accessories. The hum level to audio quality setting that seemed the best was 0db with HPF on (top switch al the way to the right) as I did in the video. In short, I suspect the hum is a factor of the DSLR and not either of these devices. As was the case with the MKE 400, I found the sound quality to be perfectly acceptable for my needs. I did find that this shotgun mic had a better directional effect which can be very advantageous outdoors.

For this test I used the HPFs setting and the 0 db setting (as shown in the photo above). In my additional testing I tried the + & - settings as well as being in normal mode. I’d probably choose to not use the HPF mode unless absolutely necessary if possible, but for the purposes of being fair in this review (i.e., comparing apples with apples) I chose to approximate the same settings as the MKE 400. During my testing, I found that the -10 db setting got rid of the hum but it also made my voice sound too muffled so I’d only use it for extreme wind conditions.

Just as I saw with the MKE 400, the web feedback varied on the build quality of the Rode VideoMic Pro. In my personal opinion I found the VideoMic Pro to be more fragile and worrisome, but just as was the case with the MKE 400 I had no issues that validated my concern. I did feel very concerned about the likelihood of damage so I was afraid to put it in my camera bag, so I would carry it in my hand when I was doing my testing. I’d recommend some type of protective storage container (could be a sandwich Tupperware type of plastic box) as I don’t see how the base of this device would survive typical field use. If you’ll only be using it in a studio this won’t matter, but my assumption is that all readers here will typically do their audio outside of their house or office.

I found this unit to be a little more flexible in terms of features and sound quality than the MKE 400, but not enough to make me think it is significantly better. From a sound quality standpoint I’d call them “close enough” when they are both set to the same setting functionally equivalent settings. I really, really, really hate the build quality of the base mount, but beyond that this is fine device. I also feel that the built-in wind sock is sufficient so the extra $30 premium for this device over the MKE 400 is a non-issue once you get the required wind sock for the MKE 400.

I would recommend this device to a friend and feel that it is decent for basic non-pro applications.  However, I would caution them to take great care with it as they should be concerned about the potential to damage the base mount.

Conclusion

Home Theater is one of my many hobbies so I am a bit of an audiophile when you get me in a movie viewing scenario. However I find that when testing these microphones my bar is a bit lower. From what I can tell from videographers I’ve talked to, the VideoMic Pro is the preferred device, but when I talk to photographers who use video on a casual basis like myself the MKE 400 is the product of choice. My primary purpose for looking at these two devices is to see which group was correct and to ultimately get one for myself. Based on my experience and anticipated usage (in a studio), I’d prefer the MKE 400. I like its smaller size and mostly solid build quality.

To order, support this blog by using the following links:

Disclosure

B&H provided me with loaner units which I returned to them after this review was completed. I also may get a commission if you purchase using my links in this article, so please support my blog by using my links.

NOTE: This site requires cookies and uses affiliate linking to sites that use cookies.

If you enjoyed this article, please support future articles like this by making a donation or saving money by using my discount coupon codes. Either way, your support is greatly appreciated!

This blog is intended for freelance writing and sharing of opinions and is not a representative of any of the companies whose links are provided on this site.

The opinions provided are of Ron Martinsen alone and do not reflect the view of any other entity

Wednesday, June 29, 2011

B&H Bargains of the Week

I get a weekly email from B&H with their latest deals but generally I ignore them as I hate to spam you with advertising. However, this week there are some really good deals that I think any photographer can appreciate so I’m sharing them with you. My apologies to those who hate stuff like this – this won’t happen very often.

Here’s the first deal for the fastest cards only:

Deal on the FASTEST cards - different from below

and here’s a deal for the more reasonably priced cards that were the fastest before the above cards came out:

SanDisk and Lexar are my favorite cards and I’ve done a comparison here which proves that your camera generally won’t benefit from anything faster than the four cards above. I also don’t like to have too many photos on one card in case something tragic happens to that card (i.e., a failure in the card). As a result my advice is to get the 8GB versions shown above, and get them now while these discounts are available. If you do mostly video, then the larger cards make more sense.

**** NOTE: You MUST add 2 or more of the same card to your cart to see the discount! ****

Canon Instant Rebates

B&H Canon Instant Savings

Click the banner above and be on the look out for the “Buy Together & Save Links” on select Canon L lenses to get instant rebates as well as $200 off the Canon PIXMA Pro9500 Mark II Inkjet Printer.

Gitzo $100 Rebates

My recent tripod recommendations article has been a hit, so I’m happy to mention that B&H has some Gitzo tripods with $100 off rebates. Check out my Gitzo Primer to make sense of the codes and keep in mind that just because the number is larger doesn’t mean its newer. Most of the are older than the tripods I recommended, but they are still great so it’s a way to save and still have a Gitzo!

NOTE: This site requires cookies and uses affiliate linking to sites that use cookies.

If you enjoyed this article, please support future articles like this by making a donation or saving money by using my discount coupon codes. Either way, your support is greatly appreciated!

This blog is intended for freelance writing and sharing of opinions and is not a representative of any of the companies whose links are provided on this site.

The opinions provided are of Ron Martinsen alone and do not reflect the view of any other entity

Tuesday, June 28, 2011

Photo of the Week - Beer Goggles

Beer Goggles

I love this fun and humorous photo by Nate Zimmer this week. Nate says he draws his inspiration from Mr. Flibble  and David Blackwell on Flickr. He has a couple others that are equally fun and very creative:

Pistols Away Steampunkier Than Thou

Congrats on a great job of accomplishing some fun shots that Mr. Fibble and David Blackwell would likely be proud of!

Be sure to click this photo above and leave some feedback on Flickr so this reader can get your feedback both good and bad (be gentle) and feel the love from our readers here!

Learn more about how you can participate in the Photo of the Week contest by clicking here.

NOTE: This site requires cookies and uses affiliate linking to sites that use cookies.

If you enjoyed this article, please support future articles like this by making a donation or saving money by using my discount coupon codes. Either way, your support is greatly appreciated!

This blog is intended for freelance writing and sharing of opinions and is not a representative of any of the companies whose links are provided on this site.

The opinions provided are of Ron Martinsen alone and do not reflect the view of any other entity

Monday, June 27, 2011

Guest Blog - Shooting Weddings Part II: Expectations & The Day Of…

Timothy Lusk is back to share some more of his pearls of wisdom on the subject of Wedding Photography. This is the second of five articles he’ll be sharing on this topic, so I hope you enjoy it – Ron

B&H Wedding Photographers Buyers Guide

This is for everyone who has invested in a DSLR over the past few years and has either thought of shooting weddings or has been asked by a friend or family member due to their thought of either saving money or because the bride or groom isn't aware of what goes into shooting a wedding.

For other articles in this series, please follow these links:

EXPECTATIONS

Ok, so you’ve booked a meeting with a potential client. What next?

Make sure when you meet with her (and her mom, most likely), you find out what details they might have in mind regarding the day’s event. One thing to note is that the client (unless they are a photographer), might not have the first clue on what it takes to compose a shot, capture that moment, or what kind of time post production can consume when the day is over with. I will go into further details in a post specifically about the contract you should have with your clients.

Commitment of Hours / Depending on the time of the ceremony and reception, you can expect to spend upwards of 12 hours shooting a wedding. If the client is on a budget, make sure to work with them and that they understand what you’re offering. It can end up being that the bride says the event is starting at 2pm and should be done by 10pm. While the latter end might be more true to the timing, expect that you’ll be arriving 2+ hours before hand to take pictures of the place settings and other displays that relate to the event.


Some shots are on "the list", others just happen

Photographs & Desired Captures / Everyone, not just the bride, will have input on what they are wanting to get out of the wedding from a photography perspective. Friends, relatives, certain poses they think are memorable. The one thing you have to be careful of is not making the client feel like you’re a know-it-all. Typically, a wedding has a certain structure. Therefore, it also has a certain “to do” list of what to capture throughout the day. As a photographer you have one of two ways of going about this. Either memorize the “checklist” and have a paper or notes in your phone to help you remember the other custom shots the client has requested, or just add everything to the list. I personally do the latter, not because I can’t retain all of those things to check off, but because it helps me refer back to my list now and then due to the times throughout the day that it might be slow and you can capture some details or casual and candid shots that you might have not remembered to do. Even though it is a list, it won’t be in order.

A list for me will be broken out as follows:

DETAILS

  • Cake
  • Tables / Settings
  • Gift table
  • Rings
  • Brides shoes
  • Brides gown
  • Flowers/bouquets
  • Programs
  • Trellis/Ceremony location

PRE-WEDDING

  • Bride getting ready*
  • Bride/mom/maid-of-honor interaction
  • Bridal party getting ready
  • Groom getting ready
  • Groom/dad/best man interaction
  • Groomsmen getting ready
  • Guests arriving/sitting down
  • Family Portraits
  • Wedding Party Portraits
  • Bride/Groom portraits
  • “First look” shots/interaction

CEREMONY

  • Bridal party entering
  • Family entering
  • Bride entering (follow down aisle)
  • Pastor
  • Bride/groom holding hands (close up)
  • Emotional shots (bride, groom, parents, guests)
  • Flower girl
  • Ring barer
  • Singers
  • Speakers
  • Groomsmen line
  • Brides maids line

RECEPTION

  • Drinks
  • DJ/Music
  • Dancing
  • Food/buffet line
  • Candid guest interaction
  • Father/daughter dance
  • Son/Mother dance
  • First Dance
  • Bouquet toss
  • Garter toss
  • Toasts
  • Cake cutting
  • Entertainment (jugglers, magicians)
  • Send off

*NOTE: Being a male photographer, brides tend to shy away from the request to get pre-wedding photos taken due to the dressing of the gown. I am fortunate to have my wife with me to help take these photos, and the bride feels more comfortable by doing so. So, if you ever have the opportunity to bring on a second shooter and you’re a male photographer, look to find a female to help with the day. You’ll get some fun and memorable photos by doing so.

THE DAY OF...

Ever heard “the early bird gets the worm”? This is very true when it comes to weddings. I have found that when I get to a wedding earlier than expected, I feel more accomplished with what I am assigned to do for the day. I can get shots out of the way early, and in some cases can get extra shots of the bride getting ready or any family involvement with getting the event set up.

Be prepared / The day, from the very minute you get to the site of the wedding, is going to be insane. The bride, while on a schedule, will most likely be confused and scattered, with a drink in hand or trying to figure out where her bridal party is at this very moment. Just go with the flow and know that you’re there to tell a story at the end of the day and from my experience, some of the shots I have taken outside of “the list” are some of my favorites.


Even when you think you've go "the shot", keep looking. It pays off.

There are going to be a lot of guests who will come up to you and ask to go take a photo of someone or something that they think is impressive. My advice: do it. It will appease them and if you prefer not to show the bride and groom later, they probably won’t recall it. It is very important to remain polite throughout the day. You never know who else might be attending the wedding that will be getting married in the next year or a set of parents who like you’re work and know their daughter would love to have you shoot their wedding.

And even though I will cover this in the gear list, make sure you have multiple cards and batteries for your camera. While I have never had to change a battery during the day, I have started out shooting too many photos during the pre-wedding and ceremony where I had to switch to only shooting JPG to allow enough room for portraits, toasts, the reception, and dancing into the night. But this also brings up another approach of “be prepared”. Know your camera and know it well. You don’t want to be shooting a wedding and have the camera start to act up on you to where you don’t think about the ISO or the aperture you’re set at could help the camera perform better.

Uncle Bob Encounter / Today, everyone has a P&S, and it’s gradually getting to the point where a lot of people are choosing to upgrade to a DSLR. This results in, you guessed it… wedding guests bringing their DSLR cameras to the celebration. While they might have a kit lens on the body, some of them will have lenses similar to what you have in your camera bag.

So what do I do in this case? Two things. If they are not a threat, you’ll know right away and don’t need to worry about them interfering with the job you’ve been paid to do. If they start to crowd your space, I was taught a great trick from a fellow photographer, Christopher Becker. He says that while the D3s with a 70-200 f/2.8 might outdo your setup at the moment, to offer some ways to improve their shots. Different angles, settings on their camera they might not know about, or anything that will make them feel more confident about what their trying to shoot. The idea behind this is to allow them to feel comfortable with you and that way you can kindly ask them to move aside while you capture the shots you need.

Wrapping up / Once the ceremony is done, this is where I feel most relaxed. I have covered most of “the list” and the photos from there on are typically candid and you won’t have to worry about key pieces like the first kiss or something that will only occur once during the night. During the reception, you’ll have to focus on toasts, dancing, cake cutting, garter and bouquet toss, and the first dances. These all will be something where you can choose the approach you want to take with it. It is also a great reason to have a second shooter. You can get different angles and make sure that that moment is really secure in the card. I always tend to have a 70-200 f/2.8 on my body, and then my wife has another body with the 24-70mm f/2.8 or an 85mm f/1.4. This way we can get some different angles as well as a different view of the moment--close-ups and as a whole.

Be approachable during the end of the wedding. If you feel you’ve missed something or need to capture some final shots of guests, do it. Talk to the newlyweds and make sure they understand you’re taking some last minute pictures before you call it a night. Committing to this will make the bride feel that you’re really focused on her and making sure that every detail is covered. Only when the bride says thank you or you know that they are finally sent off for the night, you can properly collect your gear and head home for the night. Job done.

Conclusion

Stay tuned for more articles from Timothy Lusk. Visit the links at the top of this article to see other articles in this series.

NOTE: This site requires cookies and uses affiliate linking to sites that use cookies.

If you enjoyed this article, please support future articles like this by making a donation or saving money by using my discount coupon codes. Either way, your support is greatly appreciated!

This blog is intended for freelance writing and sharing of opinions and is not a representative of any of the companies whose links are provided on this site.

The opinions provided are of Ron Martinsen alone and do not reflect the view of any other entity

REVIEW: Bryan Peterson Photo Workshop – Seattle

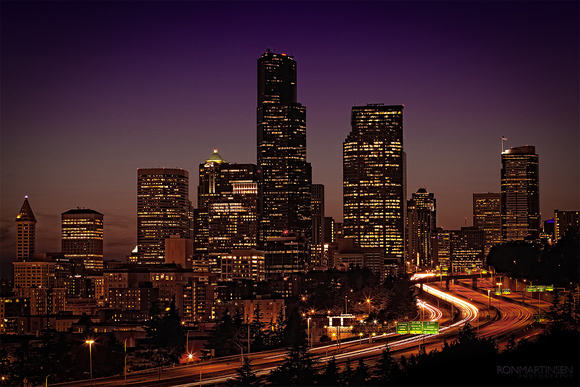
Seattle at Dusk from Dr. Jose Rizal Park
Sunset Shoot with Bryan Peterson at Dr. Jose Rizal Park
Copyright ® Ron Martinsen – All Rights Reserved

At the beginning of June 2011, I had the luxury of being Bryan Peterson’s assistant / Canon Technical Guy at his workshop here in Seattle, WA. Seattle has been my hometown for nearly 17 years, but Bryan is from the Northwest as well so it was fun to see parts of Seattle that I’ve never known through his creative eyes.

In this article I’ll share my experience in working with Bryan as an assistant and a student. I’ll also share a little bit about the students in the class as well as testimonial from one of the students in her own words.

My Favorite Images from the Workshop

To kick things off, let’s start with some of the fun images I managed to snag when I had free time to shoot. Here’s one of my favorites taken at the Graffiti Wall near the train tracks just south of Safeco Field:


Stop That Graffiti Punk!!!!
Understanding Shutter Speed with Bryan
Copyright ® Ron Martinsen – All Rights Reserved

One of the students from a previous workshop wanted to share what he had learned about shooting reflections, so we experimented together. Here’s one of the shots I got from that experiment:


Reflections at Pioneer Square
Copyright ® Ron Martinsen – All Rights Reserved

Any photographer can capture beauty from beautiful places and people, but the better photographers find beauty where the world normally sees decay. Here’s a shot I took at an old building in the warehouse district that was amazingly colorful for such a place. Thanks to this exercise I looked at the world a little differently and found beauty in the most unexpected places.


No, that’s not from the Palouse, it’s crap growing out of concrete and a fence at a run down building! With Bryan you are always Learning to See Creatively.

Take a piece of concrete, some grass, a yellow flower and some lady bugs and you can end up with an okay photo like the one below. This was one of the early lessons Bryan taught us and it was actually both fun and liberating! Some will call it cheating and others may be outraged, but you are the photographer and your goal should be to have fun making great shots. Now we didn’t destroy a botanical garden to do this, but rather dug some stuff up at a run down dock.


Creative People Can Make Pictures Anywhere

The shot below was processed with HDR Efex Pro using 5 exposures. I used Color Efex to create one of the off the wall HDR shots you see these days as my tribute to making art out of a run down building. Bryan loves going to places like this to stir up creativity and now I see why. 


Turning Decay Into Art using HDR Efex Pro

Our first stop was at the Port of Seattle where we got to enjoy great views of tugboats, fishermen (see below), etc… but what we also ended up shooting were flowers and a other objects that weren’t what you’d expect for a location like this. This was a great case study of being observant about more than the obvious at any given location.


Fishermen at the Port of Seattle

I ended up with a lot of fun shots which you can see at here.  Many are unprocessed and some are just flat out fails, but I learned a lot and had fun shooting outside of my comfort zone. Be sure to read the captions of the shots to learn more.

Learning From Bryan Peterson


Bryan Can Be A Little Enthusiastic At Times

Every since I read Learning To See Creatively I’ve been a huge Bryan Peterson fan. The book changed my life, so it’s no wonder that I ran out and bought Understanding Exposure, Beyond Portraiture, and Understanding Shutter Speed immediately afterwards. Bryan’s style of writing spoke to me and I learned a ton. It’s also why his books have been permanent residents on my Which Books Should I Read? list.

While I’ve had the pleasure of sitting down and talking to Bryan for a few hours in person and we’ve talked on the phone, this was my first chance to shoot with Bryan. In fact, I wasn’t really sure what to expect. Of course, his creativity came out big time so I learned to expect the unexpected!


Time Expired
Bryan captures a cool shot of the parking meter
with Joe’s “dead" body in the background

We were going by 8:00 AM (or earlier) each morning and wrapping up after 11:00 PM, so they were action packed days (with an afternoon break). During our various outings he’d record a little video for his PPSOP web site which usually featured a really cool shot. In the one above the subject is a parking meter that says “time expired” and offset in the background is Joe’s body. It was a brilliant shot that I would have never thought of, but I’ve seen done before (probably by Bryan <g>).

Bryan teaches while Amanda records a video for PPSOP. Hover over to see my version of this shot.
Bryan teaches while Amanda records a video for PPSOP.
Hover over the image above to see my version of this shot.

Even though I live in Seattle, Bryan took me to a couple places I’ve never been like the amazing Graffiti Wall (which I’m not sure I could find again even if I tried!). Once again at this location he recorded another PPSOP video this time where his hand was the subject. His shot came out way better than mine, but it was fun seeing how he worked.


Mary Lou and I were the only Canon shooters, everybody else was Nikon

When I managed to break away from teaching and listen to Bryan, I learned some really cool things. Unfortunately I was busy teaching a lot so I found myself missing out on more than I hoped.

I also found Bryan to be a bit more quiet on shoots than I expected. He didn’t teach the the group as a whole as often as I expected, but rather he’d find someone and work with them one on one. Given the nature of this type of teaching some students mentioned to me that they wished they get more time with Bryan than they did.  I tried to help out by giving them as much one-on-one attention as I could, so hopefully that helped.

It should also be noted that if you are observant you can gather around the person Bryan was talking to and learn a lot. If you take one of his courses I highly recommend that you do that!

The Students

Amanda the Superstar Model
Superstar
Amanda was the youngest attendee so she was the resident fashion model!

I loved the people in this class. Every single one of them was a joy to be around and all were eager and enthusiastic students – an instructors dream!

The youngest student, Amanda (pictured above), found herself as the unexpected group model when a warm body was needed. She’s a pretty girl so it worked out great.  Here’s a tip though - if you are a pretty girl attending a Bryan Peterson workshop you should plan on getting photographed – A LOT! 

Amanda was a trooper throughout the workshop who was always willing to smile and have her photo taken. As a result she earned the nickname “Superstar” from Mary Lou.

Pizza Joe from Connecticut Shows His Dark Side
Clowning Around with the Flash
Joe, a repeat workshop attendee, is a fantastic guy
with a heart of gold was a blast to be with on during the workshop

Joe had been to a Bryan Peterson workshop before and was the typical type of reader that I see on this blog. He had a great passion for photography and excellent equipment so he managed to snag some nice shots. He also had a rental car so he doubled as chauffer and refused to let people help pay for parking or gas. He’s just that kind of guy, and I really enjoyed hanging around and experimenting with some things (as above) while we were out shooting. With Joe there’s never a dull moment! 

Casino Jim Makes Something Out Of Nothing
Making Something Out Of Nothing
See that trash in Jim’s back pocket?
It was the subject of his award winning shot
that earned him a FREE BP Workshop!

Jim is in charge of a huge security staff at a Casino in Florida so he had many great stories to tell, but his real purpose was to learn. He was a sponge eager to master his camera and improve his skills. It was a real joy working with him because you could see the excitement on his face when he learned something new. I’m still in touch with Jim and suspect he’ll be a regular reader on the blog from now on.

Wade Closes In For The Macro Shot

Wade is a co-worker at my day job at Microsoft and was familiar with my blog. I hadn’t met Wade in real life prior to the class, but again I found another friend that I really enjoyed talking to. He was very quiet when shooting but his work showed his attention to detail, so it was fun to see what he ended up with at the end of the class.

Thoughts from Mary Lou Polvi

Graffiti Face by Mary Lou Polvi
Mary Lou’s Critically Acclaimed Image from the Graffiti Wall

Mary Lou was the only one of the students in attendance at this workshop who had a Canon camera, so I spent a lot of one-on-one time with her. I think she had been given the workshop as a gift from her son as she didn’t even know that Bryan Peterson was a book author! However, she was a quick study who enjoyed using my 100mm macro lens throughout the week.

Mary Lou points her Canon at me and fires
Mary Lou and I had a Canon shootout here

Mary volunteered to share her thoughts about the workshop as well as some of her images (here) that she took during the class. Here’s Mary’s thoughts in her own words:

… If you were in a creative funk, you won't be after the workshop is over. Bryan Peterson is a man of great creativity. I was expecting to do the regular tourist trap photo shoots. We went to places I would never have expected or found. His energy is boundless and his down to earth teaching style helped all of our levels of experience. What I liked the best was shooting in a place where there was absolutely "nothing" to shoot. We had a limited amount of time to come up with something creative. It amazed what wonderful photos were taken. We all turned "nothing" into "something" amazing.

I was fortunate to have Ron Martinsen as my Canon expert.  Because of  his equipment expertise I was able to take full advantage of my camera. I now have a much better understanding of my Rebel T1i and my camera lenses.

I can't wait to take another seminar next year. Between now and then I will put to use what I learned. I do know that my creativity has been taken to a new level.

Mary Lou Polvi

Picked up a camera for the first time in Jan 2010.
Trying to make my tripod be my best friend!

Ron Martinsen by Mary Lou Polvi
Here’s a shot Mary Lou took of me at the Graffiti Wall

Conclusion

The success of any workshop really boils down to three things:

  1. Did you learn some new techniques to improve your skills?
  2. Did you get some great photos?
  3. Did you have a fun time doing it?

The answer to these three questions was a yes for me, and I think it was a yes for all of the students who attended. In that respect, the workshop was a huge success.


Waiting for the Sunrise Golden Hour at Kerry Park that never arrived
As a group we decided we were tired to try any more sunrise shots – woohoo!

Based on my own observations and feedback I had from other students, I would have liked to have seen Bryan more engaged during the workshop.There were times when he was disconnected attending to business on his iPhone that was disappointing to the students who paid $995 to attend this course.

I would also like to have seen more group engagement where he taught to the group about things to improve their skills. If you were observant you could go find where he was talking to someone one-on-one and listen in, but I think it would have been better for him to announce “hey everybody, listen up” and teach some technique that all could benefit from.

With those quibbles aside, I was very happy with the locations chosen and the experiences learned during the session. I got some great shots as did the students who attended, so we were all excited at the end to show the world our new shots.

It was an honor to work along side this photography legend and pick up on his amazing creativity. I grew as a photographer and I got to meet some fantastic new people. I appreciate the opportunity to do this and I hope I’ll get a chance to work with Bryan again in the future.

Click here to learn more about Bryan Peterson’s Workshops. Be sure mention this blog if you sign up for the course as well as cc ronmartblog@martinsen.com in your signup mail to Bryan. If you don’t have time or financial resources to take one of his workshops then you should consider his PPSOP online courses like the Art of Seeing.

You can find more photos (be sure to read the captions) online at http://ronmart.smugmug.com/Blog/Review/BPWorkshop.

Suggested Reading

Here’s other articles about Bryan Peterson featured on this blog:

NOTE: This site requires cookies and uses affiliate linking to sites that use cookies.

If you enjoyed this article, please support future articles like this by making a donation or saving money by using my discount coupon codes. Either way, your support is greatly appreciated!

This blog is intended for freelance writing and sharing of opinions and is not a representative of any of the companies whose links are provided on this site.

The opinions provided are of Ron Martinsen alone and do not reflect the view of any other entity

Saturday, June 25, 2011

New X-Rite Wide Gamut Display Calibration Devices

i1Display Pro
i1Display Pro ($269.00 MSRP) 
Professional Display Calibration for the Most Demanding Color Perfectionists

X-Rite has announced some cool new calibration devices this week that are great for wide gamut displays and projectors. These are not meant to replace the current ColorMunki Photo which is a spectrophotometer that can be used to create printer profiles, but rather these replace the old Pantone Huey and i1Display2 devices.

ColorMunki Display
ColorMunki Display ($189.99 MSRP)
Advanced Display Calibration Made Easy for Color Perfectionists

Each solution comes complete with our most technologically advanced colorimeter bundled with new display and projector profiling software to ensure unrivaled color accuracy and consistency now and in the future.

Cutting Edge Instrument Technology

X-Rite's next generation colorimeter delivers unrivaled color accuracy, repeatability, and device longevity.

  • new optical system
  • new filter technology
  • new spectral calibration architecture
  • new intelligent form factor
  • supports all modern LCD display technologies including  CCFL, White LED, RGB LED, and Wide Gamut display technologies as well as projectors.
Innovative Software Features

ColorMunki Display and i1Display pro each incorporate new software technologies to make the match between your display and printer more perfect:

  • Ambient Light Measurement - automatically determine the optimum display
  • Ambient Light Smart Control - automatically monitor changes in ambient light conditions
  • Flare Correct™ -compensate for flare light (or glare) falling on surface of display
  • Intelligent Iterative Profiling - an adaptive technology that produces optimized results for maximum color accuracy
  • Automatic Display Control (ADC) technology automates the adjustment of your display's hardware (brightness/backlight, contrast, and color temperature) eliminating manual adjustments

i1Display Pro using i1Profiler Software

Both of these products come with the i1Profiler software which is really cool. Check out the video demo above.

Trade In – Trade Up! Program

Between June 20 and September 30, 2011, photographers and creative professionals can receive up to $40 cash back when they trade in their old monitor calibration system towards a new X-Rite solution. It’s as easy as 1 2 3 – Buy, Send and Receive your Money!

Buy Send In Receive
ColorMunki Display (CMUNDIS) any colorimeter $25.00 rebate
i1Display Pro (EODIS3) any colorimeter $40.00 rebate

Simply purchase one of the qualifying products shown above and submit the following to the address indicated on the rebate form:

  • the completed rebate form
  • a copy of the dated sales receipt for the ColorMunki display or i1Display Pro
  • UPC code cut from the ColorMunki display or i1Display Pro packaging
  • the colorimeter to be traded in (can be any X-Rite, PANTONE, competitor or private label colorimeter)

This offer is valid for purchases made and shipped within the US or Canada only. All rebate requests must be received on or before October 15, 2011 to qualify. This offer cannot be combined with any other offers.

image

Order Yours Today

Click here to pre-order a ColorMunki Display from B&H, or click here to order the i1Display Pro.

Click here to learn more about the ColorMunki Display visit the x-ritephoto blog, and click here to learn more about the i1Display Pro. For everything else, visit www.xritephoto.com.

If you want to do printing profiles too, then you’ll still need the existing ColorMunki Photo (currently on sale at B&H). For professionals with spectrophotometers (i.e., ColorMunki Photo), X-Rite now offers i1Publish.

Please visit back here for purchase links when I announce when they are in stock at B&H. At that time you’ll not only get the best price (probably lower than MSRP) you’ll also be able to take advantage of a trade-in or trade-up program.

NOTE: This site requires cookies and uses affiliate linking to sites that use cookies.

If you enjoyed this article, please support future articles like this by making a donation or saving money by using my discount coupon codes. Either way, your support is greatly appreciated!

This blog is intended for freelance writing and sharing of opinions and is not a representative of any of the companies whose links are provided on this site.

The opinions provided are of Ron Martinsen alone and do not reflect the view of any other entity

Friday, June 24, 2011

REVIEW: NEC PA301W 30” Display

NEC PA301W Monitor

NOTE: This model is being discontinued and has been replaced by the PA302W. Click here to go to that review now. Here’s an index of my NEC reviews not covered by this article:

When I wrote about the NEC PA Series earlier this year the response was overwhelming. I got lots of questions and lots of emails from those who bought the PA241W-BK or PA271W-BK who said they loved them. Of course for some of you asked me “what about the big 30” display”, to which I had little to say. I explained that I had heard that they weren’t as good as the 24 or 27 inch displays, but that I hadn’t actually used one myself.


My Desktop Configuration with a GTI Lightbox, PA301W and PA241W in Portrait Mode

I’m pleased to say that I’ve had the luxury of using the PA301W since March and NEC had to remind me to pony up the money to buy it or send it back. It’s with regret that I’m choosing to send it back, but not because it isn’t a blast having such a huge monitor.

I’m sending it back because for $1149.95 (at the time of this writing) I can get the PA271W-BK which I feel performs better than paying $2169 (6/23/11 @ B&H) for the PA-301W-BK. Those extra 3 inches aren’t worth $1000 to me, and the time it takes to get the 27” up to operating temperature is about 50% less. For a photographer that means that you can calibrate your display at operating temperature and work at a later time 50% faster because you aren’t waiting for the display colors to normalize.

PA301W, PA271W and PA241W Excel Overlays
Does Size Really Matter?

Don’t feel insecure by going three inches shorter with the PA271W because you don’t lose any width as the graphic above demonstrates. Instead you just lose a little height which can easily be compensated for by using my favorite configuration – a PA241W in portrait orientation to the right of the PA271W. Here’s how it breaks down:

Display Resolution Max Excel Cell
PA241W 1920x1200 AC47
PA271W 2560x1440 AM60
PA301W 2560x1600 AM67

As you can see, you only are getting an extra row that’s 160px tall (or 7 more cells in Excel), but for those pixel peepers out there that is an extra 409,600 pixels. 

Performance

Aside from the aforementioned warm-up time, and a nasty color shift at startup, this display performed very well. I was able to successfully view 10-bit per channel color on it (Windows only) and calibrate it with both a ColorMunki and i1XTreme using NEC’s SpectraView II software (required). It worked fine with my MacBook Pro and Windows 7 64-bit systems using DisplayPort connections.

Conclusion

Overall I enjoyed this display and it was nice to have the extra space. Once the display got to operating temperature it performed well and was wonderful for proofing large landscape prints. As I mentioned earlier though, for the price I’d much rather spend the money and get a PA271W-BK and a PA241W-BK which results in a lot more space and two outstanding monitors that are a brilliant together in a color managed photography workflow.

I will say that this display BLOWS AWAY the Apple 30” Cinema HD Display which is only capable of up to 16.7 million colors versus this display which can do 1.6 BILLION colors (via DisplayPort on PC only at this time). It also doesn’t have the annoying reflection problems of the Cinema HD. It also has significantly better contrast, response time, viewing angle and more so if you have a Cinema HD and want to upgrade – this is MUCH better than anything Apple has to offer – even the new Apple 27” LED Cinema display!

No matter which display you get, I highly recommend getting a ColorMunki to calibrate both your display and printer. They make a great team! I also would get the hood for the landscape display (doesn’t work on portrait orientation)

To learn more about this display, visit NEC’s website or visit B&H

Where to order

Order your NEC PA Series display by clicking any of the following B&H links:

NOTE: Use the links below to see the newer models and links for both Amazon and B&H for those new models

Other articles you may enjoy

If you enjoyed this article, you may also enjoy these:

Disclaimer

NEC loaned this display to me for a few months so I could experience it in every day life and review it. I did return this display and NEC had no influence on this article in any other way.

I may get a commission if you purchase using links in this article, so please support this blog by coming back and clicking my links when you are ready to order.

NOTE: This site requires cookies and uses affiliate linking to sites that use cookies.

If you enjoyed this article, please support future articles like this by making a donation or saving money by using my discount coupon codes. Either way, your support is greatly appreciated!

This blog is intended for freelance writing and sharing of opinions and is not a representative of any of the companies whose links are provided on this site.

The opinions provided are of Ron Martinsen alone and do not reflect the view of any other entity

Thursday, June 23, 2011

Guest Blogger: Vincent Versace - From Oz to Kansas 2.0. Almost Every Black and White Conversion Technique Known to Man

I’m happy to have Vincent Versace, the author of Welcome to Oz 2.0: A Cinematic Approach to Digital Still Photography with Photoshop (2nd Edition) and a participant in my printing series share his thoughts on black and white conversion techniques. All images are copyright Vincent Versace – All Rights Reserved.

This blog is an excerpt from the opening of my next book “From Oz to Kansas 2.0. Almost Every Black and White Conversion Technique Known to Man.” God willing, coming out this fall.

THE PLEASURE OF CREATIVITY

A Recipe for Creating

If you hear a voice within you say “you cannot paint,” then by all means paint, and that voice will be silenced.
-Vincent Van Gough

Most of us can look at the artistic work of others and decide whether or not we like a particular piece. Why then, when we view an image of our own, are we frequently fraught with ambivalent feelings? I do not understand why we tend to be our own worst critics. Certainly there are enough people in the world who will find fault with anything that we do. We must learn not to assist them.

But why pursue anything creative if we are doomed to torture ourselves about what we did and approach being creative as if there is some cosmic score keeper that decides if we are ahead or behind? The truth is that nobody but you is keeping score. We spend too much time concerning ourselves with the notion that for our creative work to be valid, others have to like it.

All artists hear a call to express themselves creatively, but too often, that voice fades with time and is replaced by one that says, “You can’t do that.” or “If it was such a brilliant idea someone else would have thought of it first.” The quickest way to silence that voice is to do exactly the thing that you think you cannot.

Hardening of the Categories

Hardening of the categories causes art disease.
- W. Eugene Smith

If you want to take more interesting pictures, stand in front of more interesting stuff.
-Joe McNally

Every image you create is an expression of the artistic inspiration that moves you. You express your creative voice by developing the ability to show what moves you without screaming for the attention of others. It means getting out of your own way and, in the moments when your creative spirit is moved, trusting that what comes from those moments will be good. Your goal should be to trust what you feel and constantly strive toward personal excellence and elegant performance. When your effectiveness becomes effortless, your images will move the viewer solely by the power that caused you to be moved.

Because you are reading this blog, I assume that most of you have chosen photography to express how you feel to the outside world. However, regardless of the path you have chosen, it is you who drives the art form bus, not the other way around. Technique exists to better help you express yourself. If there is a battle between voice and technique, voice should always win. Emotionally full and technically imperfect trumps technically perfect and emotionally vacant every time.

I believe that there is no drug as addictive or as alluring as being successful creatively. To make a living from the fruits of one’s imagination is truly a blessed way to live. But herein lies the rub. With practice, and perhaps success, we find our groove. But grooves frequently become ruts, and ruts can become trenches, and trenches can become graves in which our creativity becomes buried.

So how do you become more creative and create diverse, emotionally moving images? If you want to have more creative work, find creative moments in your everyday life. If you want to have more emotionally captivating work, let your everyday life captivate you emotionally. If you want your work to be more diverse and interesting, lead a more diverse and interesting life. In simpler terms, your work is only as good as the inspiration that you find in the life you lead.

If You Have a Minute, Tell Me Everything You Know

I would say to any artist: ‘Don’t be repressed in your work, dare to experiment, consider any urge, if in a new direction all the better.’
-Edward Weston

A discussion about photography should be about why we are moved to create the images we do, and how to best practice the things that will help our voices be heard in the clearest, truest way. A discussion about technique that excludes one about why particular techniques are chosen is like having a conversation about a repair manual.

All creativity comes from a wellspring within us, and the more frequently and diversely we exercise our creative muscles, the stronger and clearer our emotional voice becomes. Feeling that you will never do something well, is no reason not do it. Let that something become your new best friend, because it is from doing that things never before seen are born.

For me, great photographic lessons were learned from shooting both portraits and landscapes. What I learned is to shoot my landscapes like portraits and my portraits like landscapes. When I photograph a flower, am I not taking the flower’s portrait? When I photograph a person, is it not the objective, with one frame, to lay bare the essence of that person in that instant? My most successful portraits and landscapes are the ones in which those things happen.

What makes images even more successful is bringing life experiences and a knowledge base of techniques to the table. This allows you to create an image that reflects what you felt when you were taken by the moment.

I would like to tell you a story. I love to cook and, even though I know it is unlikely that I will ever be as great a cook as one of the great chefs that I know, I keep trying to learn more about cooking creatively. I had the honor of spending a week in the kitchen of John Fraser, the chef at Restaurant Dovetail in New York City. By mid-week, I had finally graduated to “preparing ingredient,” specifically – the task of chopping carrots into the equivalent of pixel-sized cubes. About half way through my second bunch of carrots, Chef Fraser walked by and told me that my efforts were not acceptable. My first thought was “.. but they are just carrots.” Apparently, my face belied that thought, and Chef Fraser said, “I see you don’t understand.” Again, I must admit I was still thinking “.. but they are just carrots.” What I said was, “No, I do not.”

“Okay,” he said, “let’s talk about something I know you understand. These carrots are not visually acceptable. You need to be cutting cubes and you have cut rectangles and diamonds. The visual composition I want to create is squares in a circle. So compositionally what you have done does not work.” I did get that! “But the bigger issue is that because they are irregularly shaped and different sizes, they will cook differently. Some parts of the carrot will be over-cooked and some will be under-cooked. My goal is to create a dish that is so visually appealing that you almost don’t want to eat it because of how pretty it looks, and when you do, you will find that it tastes even better than it looks. By not cutting the carrots uniformly, you have disrupted the pleasure of the person eating this dish. Everything matters. Everything dovetails into everything else. It’s why the restaurant is named Dovetail.” That was one of the most important lessons I have ever learned. Everything matters, and everything dovetails into everything else.

Home Run Hitting 101

Don’t let the fear of striking out ever get in your way.
-Babe Ruth

Be careful of the artist who boasts of 35 years of experience. Such a person may have one year of creativity experienced thirty-five times. To me, a true artist practices by acting; by putting truth into his or her creations so that they have an elegant simplicity. Great art is created when the artist discovers that being an artist is about understanding themselves and expressing that. Knowing more about techniques helps that expression happen.

So why should you know every black-and-white conversion technique known to man and how to use all of them? Because the more you know about how to bring forth your vision, the clearer your voice will be heard. So what if you swing and miss? If you do not swing at all, you will never have the chance to knock it out of the ballpark.

The underlying goal is a simple one: to make a print of a picture that moves you, just like it moved you the first time you saw it. The joy of creation is in knowing that your photograph moves others.

The bigger and fuller you experience life, the bigger and fuller your creative expressions of life will be. It is on that note, that you should begin all your creative symphonies. It is on that note, that you should begin every breath you take.

Closing

I’d like to thank Vincent for allowing me to re-publish this article and include his amazing black and white imagery that guides the eye on a wonderful voyage through each of his images. While I’m just a simpleton that uses Silver Efex to create my black and white images, I’m looking forward to seeing his new book. I’ve written a review on his Welcome to Oz first edition book and I am looking forward to getting around to reviewing his latest improved 2nd edition.

You can learn more about Vincent’s workshops at http://www.mainemedia.edu/workshops/photography/welcome-oz-20, or pre-order his DVD that complements this article at http://acmeeducational.com/versace/exdr. Here’s some additional resources to learn more about Vincent Versace:

If you are into black and white photography and own an Epson printer like the 3880 or 4900, then you might enjoy my articles on ABW and Exhibition Fiber, or one of Vincent’s favorite papers -  Cold Press Natural.  There’s also lots of great articles in my printing series.

Disclaimer

If you make purchases  using select links in this article, I may get a commission. Thanks for supporting this blog by using my links when purchasing.

This article first appeared on Scott Kelby’s blog earlier this year. When Vincent was asked to be a guest blogger on ronmartblog.com he suggested that I re-publish this article.

NOTE: This site requires cookies and uses affiliate linking to sites that use cookies.

If you enjoyed this article, please support future articles like this by making a donation or saving money by using my discount coupon codes. Either way, your support is greatly appreciated!

This blog is intended for freelance writing and sharing of opinions and is not a representative of any of the companies whose links are provided on this site.

The opinions provided are of Ron Martinsen alone and do not reflect the view of any other entity